Sweet Stitching Crafts Blog: Celebrating One Year Anniversary!

Wow, I can hardly believe it’s been a year since I embarked on this adventure of documenting my creative journey with Sweet Stitching Crafts. What a whirlwind it’s been—full of excitement, growth, and a few moments of disbelief. But those unsure moments are far outweighed by the overwhelming joy this blog has brought into my life.

When I first started, I had a few specific goals in mind. One of the most important? Putting myself out there—something I don’t naturally do. I’ve always been more comfortable with my thoughts and my own space, partly because of that universal fear of being judged. But I decided that this blog was going to be my way of challenging myself, pushing into uncomfortable situations, and seeing where it led me. And I love what I’m seeing! It feels so freeing to express myself creatively, whether I’m crafting or writing, and I hope to keep pushing myself to embrace even more freedom in the year ahead.

Another goal I set was to embrace all my crafts! Yes, all of them! Spinning, weaving, embroidery, knitting, crocheting, rug hooking—the list goes on. Sometimes I joke that I’m cheating on one craft with another, but the truth is, I love them equally. People might say that focusing on one thing would help me master it, and sure, becoming an expert in one craft has its appeal. But that’s not why I craft. I do it for the way it makes me feel—it lifts my mood, builds my confidence, and melts away stress.

I also started this blog with the hope of encouraging others to dive into crafting. I’ve met so many people who say they wish they knew how to craft but are too afraid to try. My advice? Just go for it! Pick any craft that intrigues you and give it a shot. If it’s not for you, move on to the next one. Crafting is such a personal journey, and there’s no wrong way to approach it. To those of you who’ve reached out to tell me that the blog has inspired you, thank you. Your messages mean the world and remind me that my crafting is making a positive impact!

So, what’s next for Sweet Stitching Crafts? Plenty more of what you’ve already seen! I hope to take you along on field trips (fingers crossed!), share helpful tips, and keep you updated on ongoing projects. I still need to share my experience with my Valais Blacknose sheep fleece that I sent to Wool4Ewe for processing, as well as the refurbishment of my “new to me” floor loom. I’m also toying with the idea of adding a book review feature, since I love reading about crafts and often enjoy book recommendations from other bloggers.

If there’s anything you’d like me to explore more deeply, feel free to drop a comment below. I truly appreciate each and every one of you who’ve spent time with me on this journey. Here’s to another year of crafting and connecting!

Happy Crafting! 😊

Processing Wool Fleece at a Local Mill: Lessons Learned

I unexpectedly received some Valais Blacknose sheep fleece as a generous gift from a new shepherd, introduced by a mutual friend who knew I was a handspinner and weaver. These sheep are famously cute; just Google “cutest sheep in the world” to see them. Our friend texted me, asking if I wanted the fleece, and I quickly replied, “yes.” A few days later, I received the beautiful wool fleece bundles and started thinking about processing fleece into roving for spinning. Last year, my friend and I planned to tour a local fiber mill, and now there’s a real incentive to do it. In my excitement, I realized I have many questions about the next steps to get the best outcome from processing this precious fiber at my local mill. Here’s what I learned!

1) Skirting the fleece is an important step!

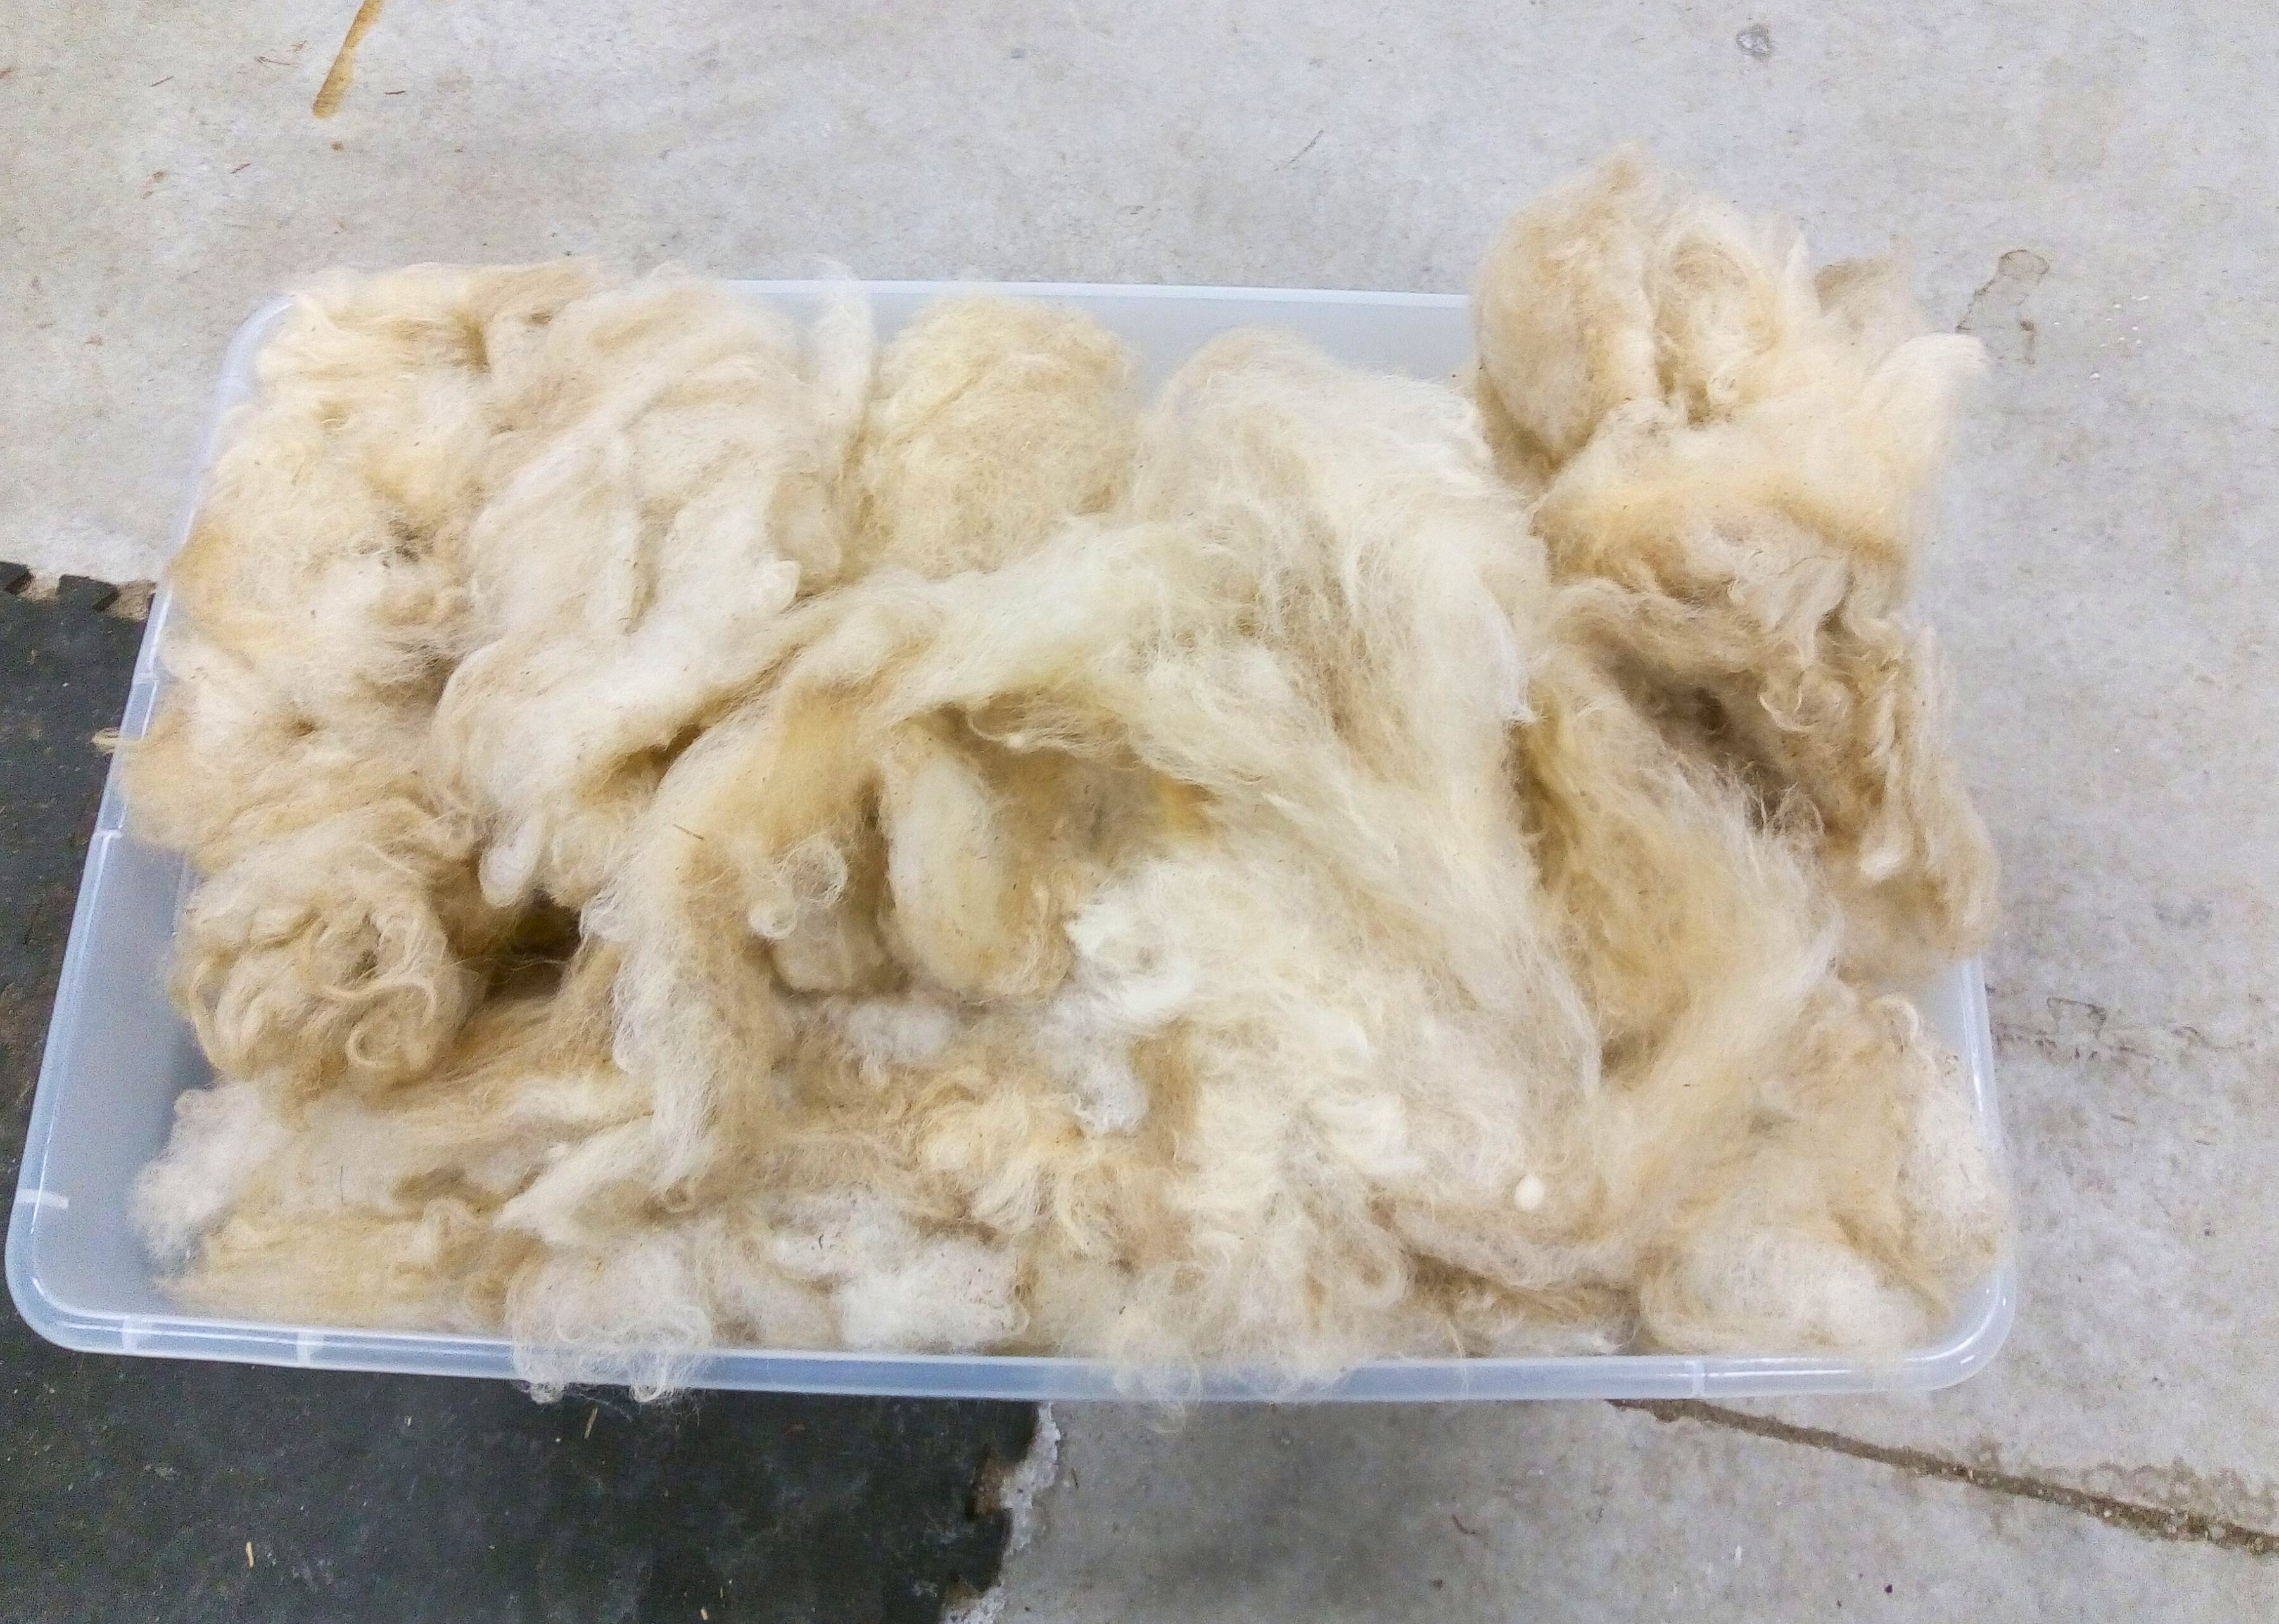
Skirt the fleece – What does skirting mean? It’s not about dressing your fleece with a tutu but removing the less desirable parts that come with raw fleece, such as vegetative matter (VM)/hay, tags (feces), and second cuts (shorter pieces of fleece from shearing an area twice). Skirting is a crucial step in preparing your fleece for the mill. Most mills charge based on the incoming fleece’s weight, so skirting removes unusable waste like dirt and debris, reducing the weight and cost. Skirting a fleece takes time and energy, and it’s best to avoid windy days to prevent your fleece from blowing away—ask me how I know! In the future, consider making a skirting table, a frame with a screen that lets dirt and debris fall through. There are several YouTube videos on how to make your own like this one by Shepherd Industries .

valais black nose sheep
Valais black nose sheep photo credit- monikas_wunderwelt

2) Make a list of questions to ask the mill prior to sending your fleeces for processing.

  • What is the minimal and maximal staple length their equipment can handle?
    • Staple length is the length of lock or fiber from butt to tip.
  • Is there a minimum amount of fiber that is required to get processed ?
    • My local mill  is a small operation and will work with small batches even if you only have one fleece to process.
  • What breeds of sheep the mill tends to process?
    • This turned out to be a very important question for me because Valais blacknose sheep is not a common breed here in Canada and this breed tends to have a long staple length. One of my fleeces could not be processed because it had a staple length greater than 8 inches.
wool fleece skirted
my skirted wool fleece
  • What is the turn around time for processing your fleece?
    • The estimated time in my case will be 3 to 4 months which is fine since I still have fiber I can spin and it gives me time to brainstorm ideas . It could be worse considering some mills have a year turnaround time.
  • What processing services do they provide?
    • My options were limited to making a roving or batt or felted into sheets. This mill had only a picker, carder and felting machine onsite. Yarn can be done but it is sent to another mill.  Some mills have services include dyeing and  blending with other fibers.

Another useful tip I found is to prewash your fleece to save on costs, as approximately 30% of the dry weight is due to lanolin. If your fleece is very dirty, mills may charge an additional fee to clean it.

Since this is my first time processing a fleece, I’m sure I’m only scratching the surface of the topic. What I’ve learned so far has made me respect the labor-intensive process of converting fleece into yarn even more. While I know how much time it takes to make yarn, I’ve discovered there are many additional steps required to transform raw fleece into a spin-ready preparation. I admire handspinners who process their own fleece and might try it myself in the future. For now, I appreciate the opportunity to support local mills. Have you ever bought fleece and processed it yourself, or have you sent it out to a mill? Feel free to comment below.

Spinning Yarn Is Worth It!

When I started spinning yarn, people often asked why I bothered when it’s so easy to buy. It’s a fair question, and I often wish I could explain in detail why. So, here’s a brief reminder for myself and an invitation for others to understand why I love spinning yarn. I hope fellow handspinners can relate, and those curious about spinning will dive into this rewarding craft and get hooked, just like I did.

1) One of a Kind!

Handspun yarn stands out distinctly, bearing the unmistakable mark of human craftsmanship that is difficult to replicate by machines. This human touch, with its imperfections, adds character to the yarn, making it special. Why does this matter? When you use handspun yarn in any fiber craft, it adds a unique quality to the pattern and, consequently, to the final design of your project. For instance, last fall, I worked on a French weaving project, which I detailed in my blog post “Harvesting Creativity.” While the weaving pattern itself was beautiful, using handspun yarn made the pattern more prominent, enhancing the overall design.

handspun yarn
handspun yarn

From time to time, I enjoy going through my collection of handspun yarn to remind myself of what I have and to motivate myself to use it more in my fiber crafts instead of just keeping it stored away. It’s a way for me to get excited about upcoming projects and, despite my attempts to envision the finished item, I’m always pleasantly surprised by how it turns out. Because handspun yarn is so unique, it’s difficult to predict how it will behave or which aspects of a design it will highlight, and I believe that’s part of its charm. I’m looking forward to using it in projects I haven’t tried before, like rug hooking, and I’ll be sure to update you when I do.

2) Variability

I appreciate the versatility that handspun yarn offers, particularly in terms of its variability. One key aspect for me is the size or thickness of the yarn. While commercial yarn comes in different weights or sizes, I can still achieve variability even within these weight classes. For instance, my favorite yarn to use, fingering weight (also known as 4 ply yarn), allows me to create a thicker version that borders on sport weight yarn, or I can go the opposite way and produce almost lace weight without spinning too fine.

Another aspect I enjoy is the ability to control the number of plies to achieve the desired thickness and sturdiness of the yarn. For example, when knitting socks, a 3-ply yarn is generally preferred over a 2-ply yarn because the additional strand provides more resilience against friction when the socks are worn.

bobbin of single ply yarn

Most importantly, the variability of color arrangement is key. Fibers can be divided at color changes and spun separately, or divided into thin strips and spun randomly. This encourages more blending of colors, creating visual interest in the yarn strands and ultimately enhancing the final handmade project.

3) Enjoyment!

Expressing the joy of spinning requires acknowledging both its technical aspects and its inherent fulfillment. While learning the technicalities may seem daunting at first, once you find your rhythm, spinning becomes truly enjoyable. This enjoyment extends into other fiber crafts like knitting or weaving with handspun yarn. The unique texture and feel of handspun yarn, distinct from commercial yarns, add to the pleasure of working with it. Moreover, the knowledge that you’re creating from scratch adds depth to the slow making journey, fostering a greater appreciation for the final product and the creative process itself.

handspun yarn
2 ply handspun yarn

If it wasn’t clear from my earlier words, I truly believe that spinning yarn is worth the investment. While it may indeed be more expensive and time-consuming compared to buying commercial yarn, the unique qualities, variability, and enjoyment factor it offers are unparalleled. The satisfaction derived from creating something entirely unique and the joy it brings to future projects outweigh the cost considerations for me. I’m eager to hear your thoughts on spinning or working with handspun yarn. Please feel free to share your comments below.

Reigniting My Spinning Groove: Learning How to Spin Yarn Again!

Music:  Wonders Abound by  Joyspring

I have been spinning since 2011 and I would spin for hours daily.I was addicted and couldn’t fathom taking a break. Unbelievably, I went an entire year without spinning. This unexpected pause happened because the drive band on my spinning wheel broke, and I needed to replace it. I’d used the same band for over 8 years, so its breakage was inevitable. Nothing lasts forever!  Long story short, it took a year to fix my Majacraft Little Gem II spinning wheel, and when I could finally spin again, I felt a mix of excitement and doubt. I questioned if I still knew how to do it. The good news is that this story has a happy ending. I got reacquainted with my spinning wheel by following these five steps:

1) Practice peddling first!

Yup just like how you learned to spin the first time I recommend just start peddling. Old age saying: Practice makes perfect is true! Patience is not my strongest virtue so you can imagine I wanted to skip this step all together and start making yarn. But just like how my spinning guru (Lori, from the Black Lamb) taught me in the beginning it is an essential step if you want to establish a rhythm while spinning. Yes, I had to get my groove back and guess what I still have rhythm. How long should you just practice peddling?  There is no hard and fast rule! Keep peddling until you feel comfortable with your spinning wheel.

spinning wheel

2) Pick a wool fiber that is easy to spin

One with a longer staple length and where all the fibers are aligned in the same direction.  The more basic  wool preparations (roving with no mixed blends of fiber types such as superwash merino cashmere blend) the better control you have while drafting because they are less slippery to work with. You can just focus on learning how to draft again in rhythm with the peddling of your wheel.  Now I have every intention to return to my luxurious fiber blends because they are heavenly to spin with, even better to knit with and plus I still have a big fiber stash to get through.

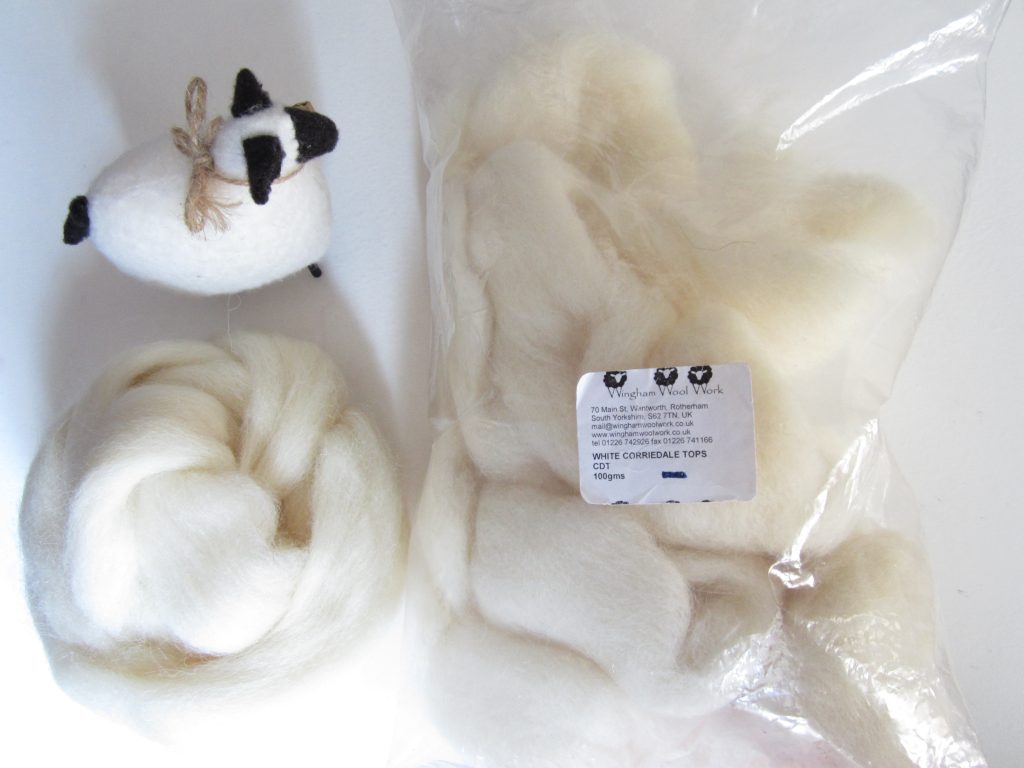
wool roving fiber

I received some awesome white wool from Wingham Wool Work through a fiber swap on Ravelry – such a thoughtful gift from my swap partner. I decided to work with the white wool to see how consistent I could make my spinning, which is important to me so that I can create even and consistent yarn. While I know using multicolored wool would have been more fun, I wouldn’t have been able to gauge the consistency of my yarn spinning. Plus, consistent spinning means that I can knit uniformed stitches, which is always a plus. Can’t wait to see what I’ll create with this yarn!

3) Reduce brake band tension

Readjust your brake band tension such that the wheel (specifically the flyer) does not fill the bobbin with the yarn as quickly and allow you enough time to draft properly. That way you are not fighting with the wheel. Keeping a consistent rhythm is challenging enough on your first go. 

4) Create a relaxing environment

Can I be honest with you? I was nervous, which makes my muscles, especially my hands, tense up and grip my fiber supply tightly. This isn’t good for spinning because it leads to fiber entanglement and makes drafting difficult. Smooth drafting is crucial for creating consistent singles, which, in turn, helps produce beautiful 2 or 3 ply yarns. To ease my nerves, I set up a relaxing environment with a diffuser filled with calming essential oils and silence; no electronics, which I used to have when spinning.

5) Take breaks!

It is a good idea to step away from the wheel time to time. It allows you to re-evaluate what you have done. You might want to adjust how you are sitting or reposition the orientation of the orifice or even the tension on your wheel for the next spinning session.

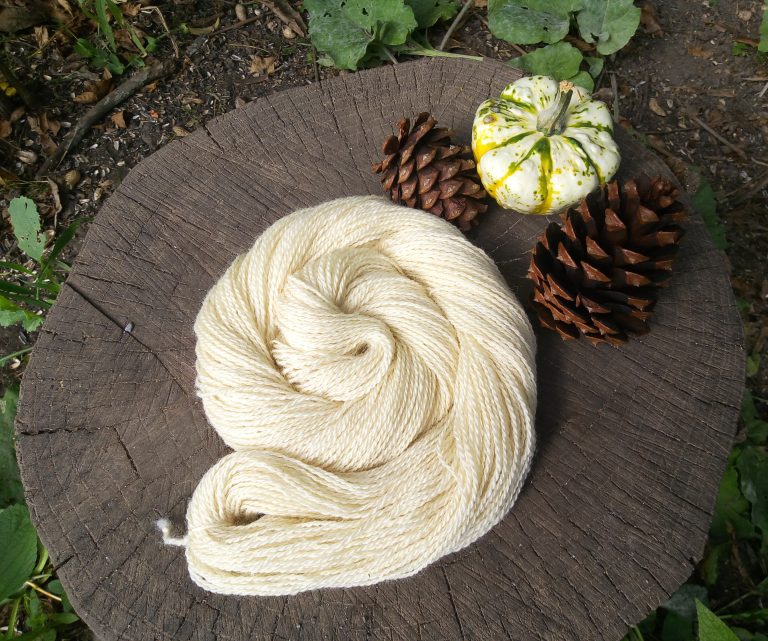
handspun yarn

The question, “Can I start spinning again?” can definitely be answered with a resounding “Yes.” All it required was establishing a rhythm, selecting the right fiber, adjusting tension, staying calm, and taking breaks. Handspinners often have various methods to reconnect with their spinning wheel, whether an old one or a new addition to their collection. My goal as a handspinner was rediscovering the joy of spinning, rather than delving into technical and analytical aspects. I find the most enjoyment in spinning when I’m fully present in each drafting moment. After spinning the singles, I consider how to ply them or sometimes let the singles sit while I work on another fiber. It’s a slow, satisfying journey, and I’m content as long as I’m in my spinning groove. If you’ve taken a break from spinning, please share your experiences and methods for getting back on track in the comments below!