It feels wonderful to be getting back into the rhythm of making again. Even though I haven’t been sharing much about my projects during the latter part of 2025 and the start of 2026, I’ve still been busy creating. Life gets hectic sometimes and can pull me in all sorts of directions, making it easy to lose my footing. I really miss putting my thoughts on paper and connecting over my love for making. So, I’ve decided to jump back in—no guilt, just a fresh commitment to why this blog exists: to feel connected again and see where the journey takes me in the making community.
What Have I Been Up To?
Lately, weaving and spinning have captured my heart, especially working with locally sourced wool. If you’ve followed my earlier posts, you know I’ve been bringing raw fleece to a local fiber mill, Wool 4 Ewe, and getting it processed into roving to spin on my wheel. I spent much of last year and even this year spinning that fleece into yarn for weaving projects. One big goal was to spin enough yarn to use as weft for a couch throw I made for someone. After finishing that project on my larger 45-inch Leclerc Fanny loom, I felt inspired to keep spinning for more throws—and maybe even bigger projects like a twin-size coverlet measuring about 60 by 80 inches.
Handwoven throw in progress on my 45inch Leclerc Fanny Floor loom
For my previous project, I used an 8/2 cotton warp set at 16 ends per inch, as recommended in a book about traditional coverlets by Helen Jarvis. The single-ply wool yarn I spun was about DK weight. After wet finishing and drying, the blanket had a scrumptious drape—cozy for chilly nights, and light enough to hang nicely on the couch.
Current handwoven throw in progress. Weaving with 2 ply handspun yarn.
On my smaller antique loom, I’ve been weaving hand towels using Venne organic cotton 8/2 yarn, a new discovery for me. I’ve been mixing purples in a shadow play pattern from a Nov/Dec 2021 Handwoven magazine issue. I often wonder about the difference between regular cotton and organic cotton. Honestly, after washing and drying on low, these towels feel so much softer in hand. I’ll definitely revisit Venne organic 8/2 cotton yarn—it seems worth the extra splurge!
Knitting has been a bit slower lately. I’ve been working on finishing a pair of socks using hand-dyed yarn from a swap partner (who dyed it herself!). I tried using the yarn in different projects, but didn’t love how it looked, so I boldly ripped it out and kept hunting for the right pattern. This lace pattern I’m working with now lets the yarn’s color variation shine without pooling too much in any one spot.
Current handknit socks in progress using hand-dyed yarn
Looking Ahead: Goals for 2026
My main goal for 2026 is more spinning and weaving—no surprise there—especially using natural, locally sourced fleece in new weaving projects.
I also want to get back into knitting sweaters. I’ve spun yarn for sweaters before but sometimes get distracted by quicker projects. Although prepping samples and doing gauge swatches isn’t my favourite, I know it’s important for getting the right fit. Right now, I have some alpaca yarn from a local fiber mill that I hope to use. I have my eye on a few patterns, but I’m not rushing—finding the perfect sweater pattern for that yarn is part of the fun!
I’m sure there will be more projects popping up and joining my to-do list, since I like to keep things flexible and let my creativity lead the way. Until next time, happy crafting—and I’ll be back soon to share more adventures!
If you’ve ever worked with handspun yarn—or are thinking about it—you’ve probably wondered: Is there a plan for what this fluff will become? The truth? Sometimes yes, but often no.
For me, spinning yarn is more about the process than the product. The rhythmic hum of the spinning wheel, the tactile pleasure of the fiber slipping through my fingers, and the anticipation of how the colors will blend together are the reasons I spin. Sure, I love seeing the final product—whether it’s a cozy sweater or a woven scarf—but by the time the yarn is finished, I’m often already dreaming about the next fleece or hand-dyed fiber I’ll spin.
Still, the magic doesn’t stop at spinning. The real adventure begins when you start working with your handspun yarn. Here are a few things I’ve learned along the way, which might help you as you embark on your own handspun projects.
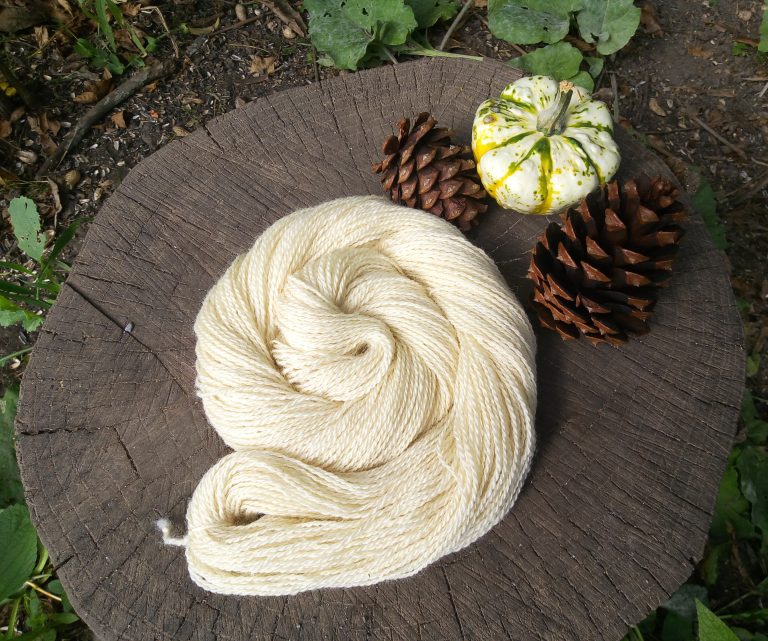
2 ply fingering weight handspun yarn
1. Understanding Your Yarn’s Structure
When using commercial yarn, we often choose based on its thickness or weight, categorized as lace, fingering, sport, DK, worsted, aran, or bulky. With handspun yarn, determining the weight is a bit more hands-on.
I use a wraps per inch (WPI) tool—a simple ruler will do! Wrap the yarn around the ruler for one inch, count the wraps, and compare it to a WPI chart to find its weight.
The number of plies also affects the yarn’s thickness and structure. A two-ply yarn is versatile and works well for most projects, offering a balanced feel and good stitch definition. For sturdier projects, like socks or outerwear, a three-ply yarn provides more roundness and strength. Even the way you ply matters—traditional plies versus chain plies can change the drape, durability, and overall look of the finished project.
2. Swatching: Your Yarn’s Test Drive
Swatching might feel optional, but it’s incredibly informative, especially with handspun yarn.
A small swatch can reveal:
Color changes: How do the hues transition from one to the next?
Stitch definition: Will the yarn’s texture shine in cables or lacework?
Drape: How does the fabric feel and move?
For knitters and crocheters, swatching helps you decide on patterns that highlight the yarn’s unique qualities. For weavers, a sampling step can help determine the fabric’s density (ends per inch) and ensure your yarn is suitable for the weave structure you have in mind.
weaving overshot sample with handspun yarn
3. Choosing Patterns or Weave Structures
When it comes to handspun yarn, the possibilities are endless. You can work with nearly any pattern—as long as you can match the required gauge.
Personally, I gravitate toward simple designs that let the yarn take center stage:
Knitting: Garter stitch and stockinette stitch allow the natural variations in handspun yarn to shine.
Crocheting: Simple, repetitive patterns enhance the yarn’s beauty without overwhelming it.
Weaving: I’ve found that using handspun yarn as weft yarn in overshot patterns adds stunning texture and depth. For single-ply yarns, plain weave structures beautifully highlight the yarn’s natural striping, especially when it’s multicolored.
A great resource for selecting knitting or crochet patterns is Ravelry’s pattern browser. You can filter by yarn weight, yardage, and even specific attributes to find a project that fits your handspun perfectly.
Knitted sweater using handspun yarn on display at Shuttlebug Handweavers and Spinners Open House
The Journey of Handspun Yarn
Working with handspun yarn is more than just crafting—it’s an exploration of creativity and texture. Each skein holds a story, from the fiber it once was to the fabric it will become. And as much as I love the finished products, it’s the journey—the hours spent spinning, swatching, and creating—that brings me the most joy.
So, if you’ve been hesitant to use your handspun yarn, don’t wait! Embrace the process, experiment with patterns, and discover the magic hidden within each handmade skein.
Happy spinning—and even happier creating!
What’s your favorite way to use handspun yarn? Share your experience in the comments below!
Earlier this year, I had an incredible opportunity to tour my local fiber mill, Wool 4 Ewe, when I dropped off my raw sheep fleece to be processed. This was my first time visiting a mill and seeing the steps involved in transforming raw fleece. Historically, I’ve always spun from roving that was already pre-processed and hand-dyed, so taking part in the entire journey—from washing to carding and spinning—felt like a whole new world. You can review more details in my past blog post, Processing Wool Fleece at a local mill: Lessons learned.
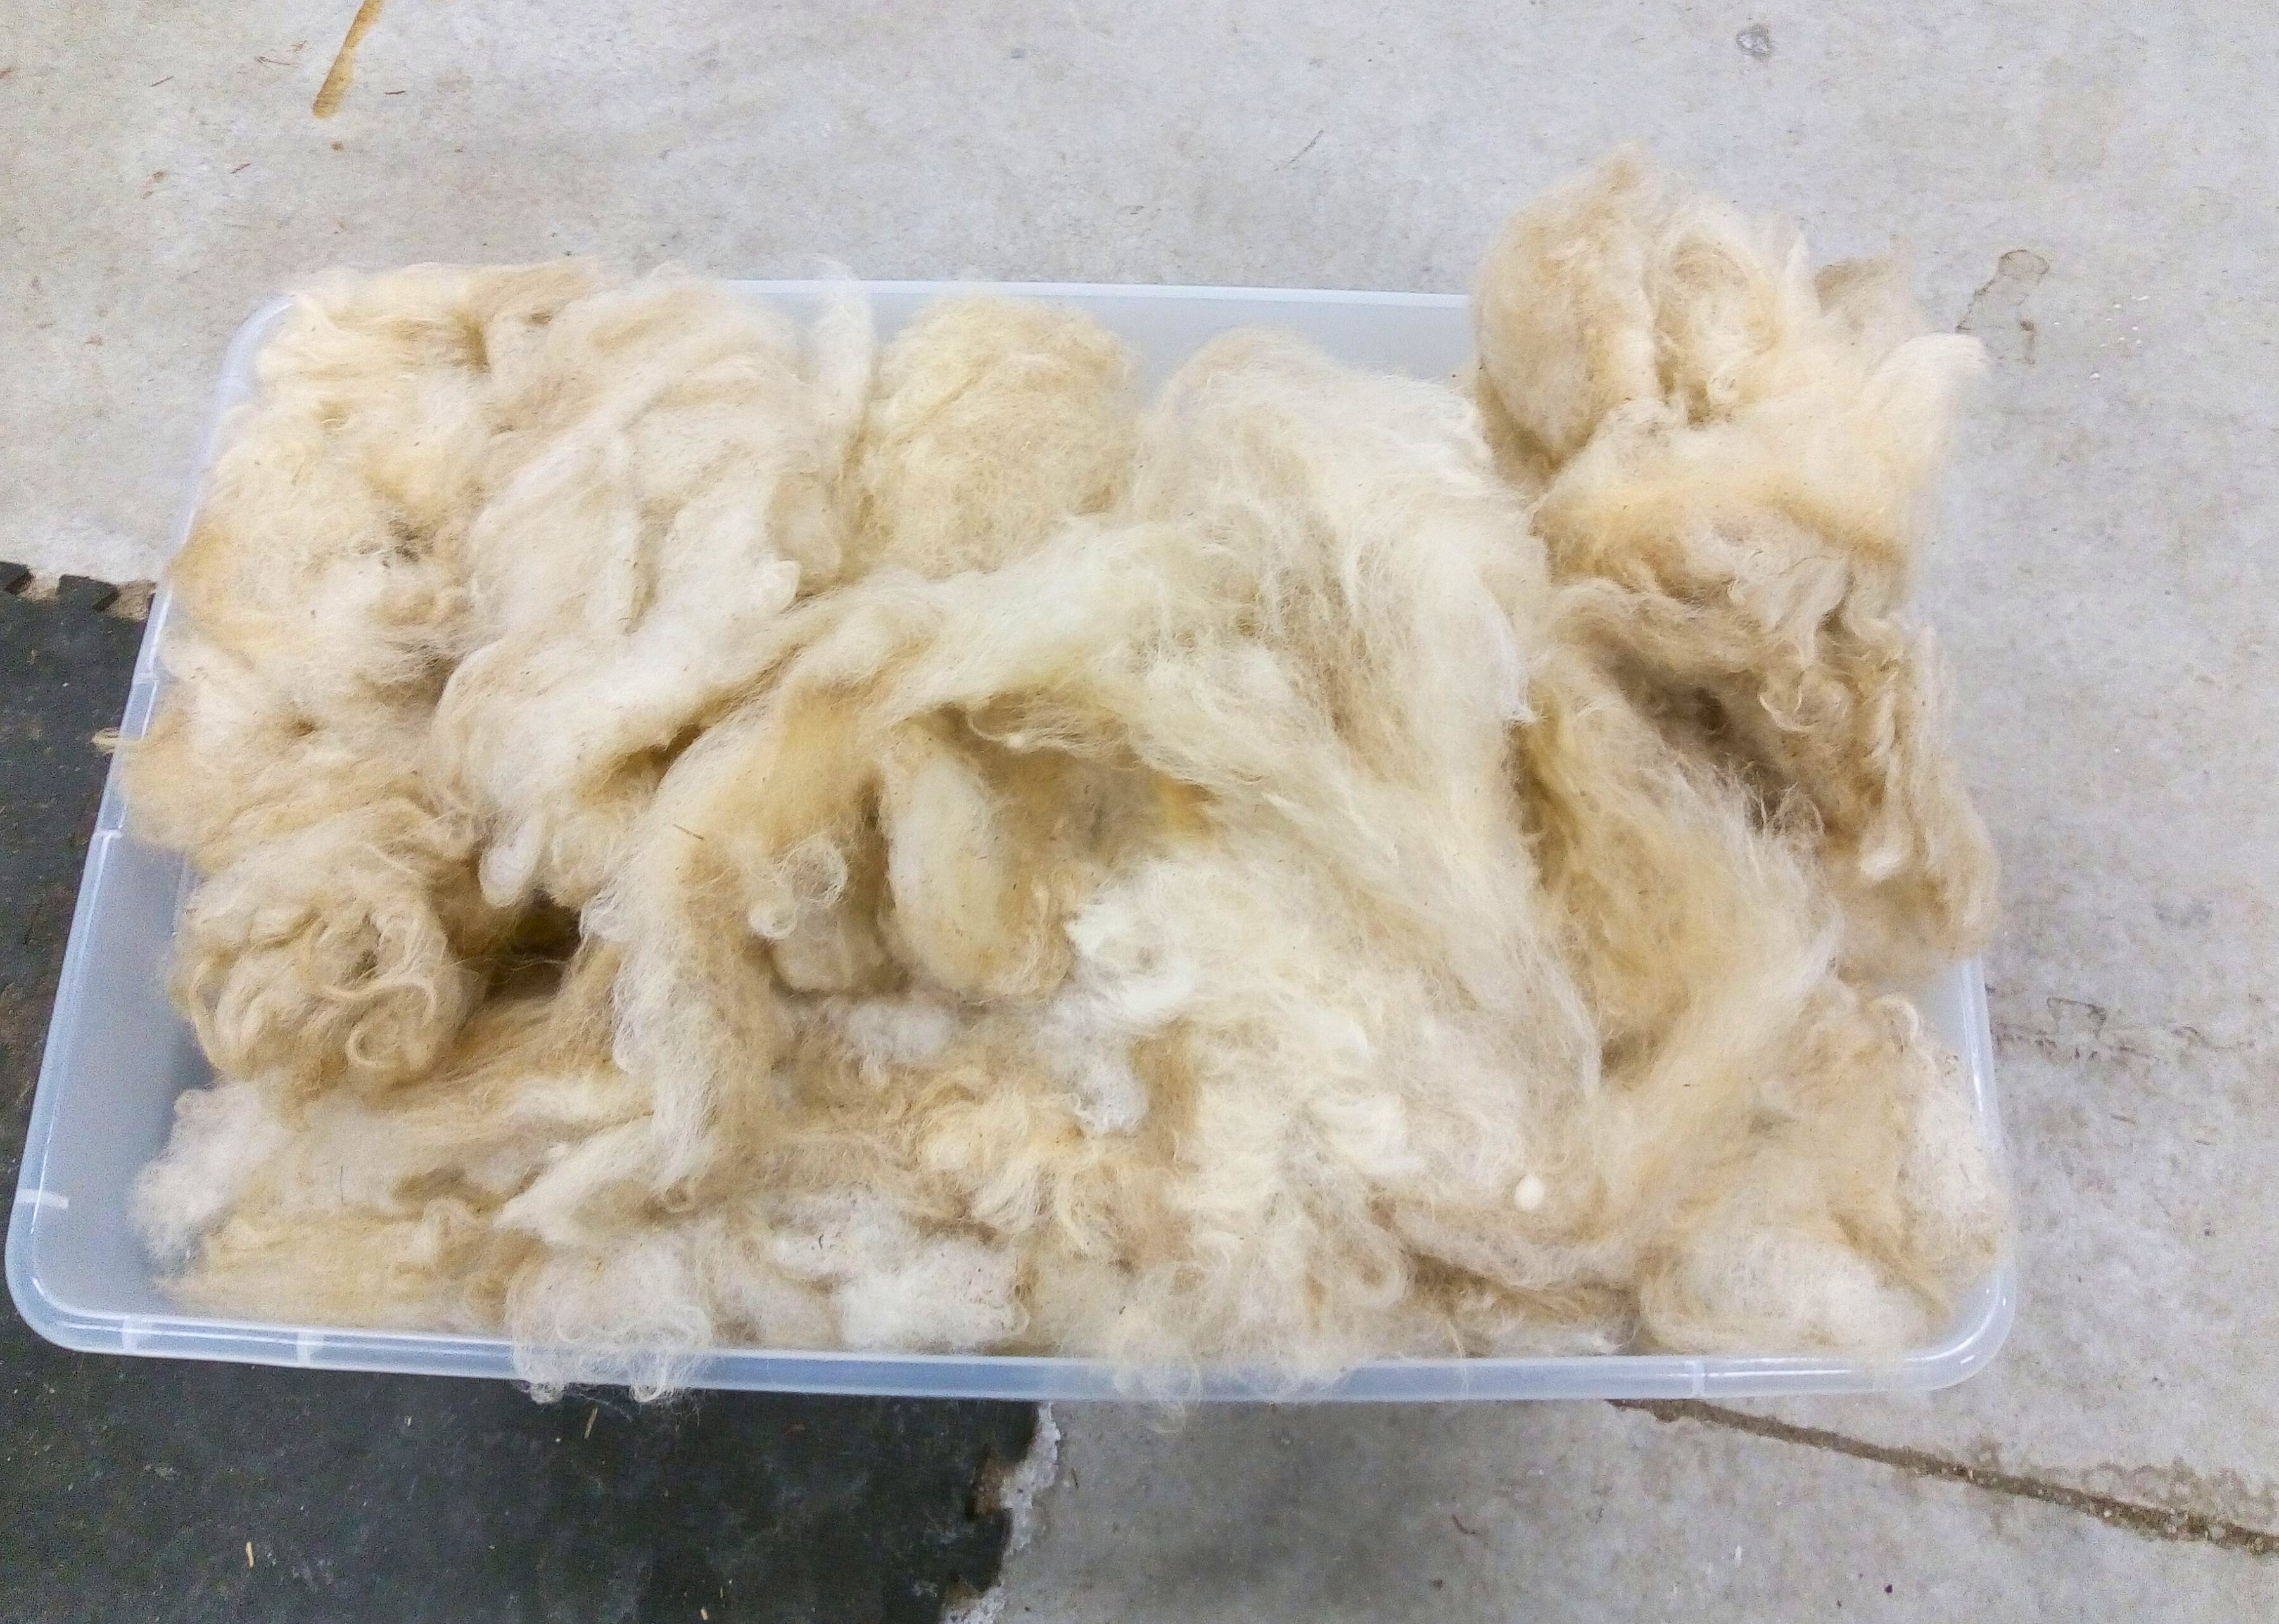
I recently received the email that my fleece was finally ready for pickup. After months of anticipation, I couldn’t wait to see the results of the processing. The raw fleece I brought in weighed around 5.395 pounds, and after scouring and processing, it yielded five beautiful bumps of 110-gram roving each. Now, if you’re doing the math, you might notice a discrepancy in weight. The difference stems largely from removing the lanolin in the scouring process, which can reduce the original fleece weight by up to 30-40%.
Heading into the picker
fleece heading into the carder
sheep roving
Ann, the owner of Wool 4 Ewe, kindly documented the processing steps with photos, showcasing the journey from a raw, lanolin-rich fleece to clean, fluffy roving. The fleece underwent several stages: it was first scoured (washed) to remove dirt and lanolin, then picked and carded to untangle and align the fibers, and finally drafted into rovings. The transformation was amazing, and I now have five soft bumps of roving, ready for crafting.
What’s Next for My Valais Blacknose Roving?
Now that I have the roving in hand, I’m contemplating what to make with it. This is my first time working with Valais Blacknose wool, and it’s known for its long staple length, which is ideal for spinning into a single-ply yarn. My goal is to achieve a sturdy single-ply with minimal fraying and piling, allowing me to use it for multiple projects. I’m leaning towards incorporating it into an upcoming weaving project, but I’ll need to assess how it feels once spun—if it’s too scratchy for wearables, it may be better suited for items that won’t sit directly against the skin, like a cozy throw.
One possibility I’m excited about is exploring rug hooking with this roving. The fluffy, dense texture would work well to create soft clouds in scenic designs or even the illusion of fur or textured details in animal motifs. Another practical use I’m considering is using the roving as a natural stuffing for pillows or knitted toys. Typically, I use polyester filling, but I’m shifting toward more sustainable materials, and the density and softness of this roving would provide fantastic definition and texture for stuffed crafts.
The Joy of Using Local Fiber
Using local wool has added a special connection to my crafting. Knowing that the fibers came from a nearby farm and were processed at a local mill makes each project feel more personal and intentional. Supporting local farmers and fiber mills has also become a meaningful part of my journey as a crafter. This experience has been such a joy, and I’m excited to keep building my stash with locally grown fibers! Are you currently working with locally sourced fiber? Please feel free to comment below, I would love to hear from you.
July began with an exciting visit to a Twin Alpaca Farm and Fiber Mill in Millbrook, Ontario, organized by my local handweaving and spinning guild. On the first Saturday of the month, I arrived at the farm on a sunny day, greeted by green pastures and alpacas roaming around. It was my first time visiting a farm that raises alpacas and processes their fiber on-site. The farm also had a store selling roving, yarn, and handmade items made from alpaca fleece. In this blog post, I’ll share some highlights of my visit and how I’ve used alpaca fiber in my projects.
1) How Alpacas are raised
The first part of the tour focused on how they raise their Huacaya alpacas. Unlike suri alpacas, Huacayas have fleece that is fluffy and dense, similar to wool. The alpacas are shorn once a year, and they had been recently shorn when we visited. The farmers emphasized the importance of good husbandry, including a nutrient-dense diet and regular shearing, to produce high-quality fleece. This is important to consider when buying alpaca fleece, as a farm’s primary objective (whether for food, fleece, or hobby) influences their care practices. For hand spinners, good quality fleece is essential for an enjoyable spinning process and a beautiful final product. It was reassuring to hear that this farm prioritizes producing great fleece.
During the tour, we got to feed the alpacas oats. Initially cautious, the alpacas eventually approached us for the treat. Despite my initial apprehension about these relatively large animals (I’m barely 5 feet tall) approaching, it was a calming and enjoyable experience.
The farmers can identify each alpaca by sight, and the alpacas respond to their names. Alpacas come in up to 50 natural shades, eliminating the need to dye their fiber. Their fleece has a staple length (cut end to the tip of the lock) of 3 to 4 inches, ideal for hand carding, an important factor to keep in mind when considering to process their fleece by hand.
huacaya alpacas
2) How Alpaca Fleece is Processed
Earlier this year, I visited a fiber mill called Wool 4 Ewe. This mill, primarily run by Barb, one of the Twin Alpaca owners, operates at full capacity nearly year-round, except in January and February. The mill has extensive equipment, including a dehairing machine and a spinning/plying machine to make yarn.
The alpaca fleece goes through the same milling process as sheep fleece, involving steps like picking and carding. The dehairing machine removes guard hairs from the alpaca fleece, which cause fuzziness, resulting in a smoother and shinier yarn. The mill typically produces DK and worsted weight yarn.
I discovered that using the spinning machine to achieve the desired final yarn is somewhat of an art, similar to hand spinning. Often, alpaca fleece is blended with other fibers, such as merino, bamboo, and silk, to enhance the yarn’s stability.
spinning machine used to make yarn
3) How I have used alpaca in my crafting journey
* Spun alpaca fleece to make yarn
A year ago, I was gifted a 2-ounce alpaca batt from a farm called Shear Joy Alpacas. I spun it into a semi-worsted 2-ply sport weight yarn. Initially, I planned to keep it as singles, but plying them together created an interesting marled effect. I intend to weave this handspun yarn with other commercially processed alpaca yarn to have enough yardage for a blanket. Since alpaca yarn has a nice drape and is super soft, it will make a cozy throw for the cooler months.
handspun yarn from alpaca fleece
* Crochet a blanket
I started making a blanket with alpaca yarn about 10 years ago. Using a commercial alpaca and wool blend in teal, I began crocheting the Hexagon Panel Afghan by Marcia Walton. It’s still a work in progress, but I recently downloaded the pattern again to continue and hopefully finish it sometime this decade LOL!
alpaca wool blend crochet blanket panel
The alpaca tour reminded me to broaden my interests beyond just wool in my crafting journey. Its soft texture could add a nice touch to many handmade items. I’m excited to learn more about it as opportunities come up. Have you worked with alpaca fiber? If so, what did you make and did you enjoy it? Please share your thoughts in the comments below.
I unexpectedly received some Valais Blacknose sheep fleece as a generous gift from a new shepherd, introduced by a mutual friend who knew I was a handspinner and weaver. These sheep are famously cute; just Google “cutest sheep in the world” to see them. Our friend texted me, asking if I wanted the fleece, and I quickly replied, “yes.” A few days later, I received the beautiful wool fleece bundles and started thinking about processing fleece into roving for spinning. Last year, my friend and I planned to tour a local fiber mill, and now there’s a real incentive to do it. In my excitement, I realized I have many questions about the next steps to get the best outcome from processing this precious fiber at my local mill. Here’s what I learned!
1) Skirting the fleece is an important step!
Skirt the fleece – What does skirting mean? It’s not about dressing your fleece with a tutu but removing the less desirable parts that come with raw fleece, such as vegetative matter (VM)/hay, tags (feces), and second cuts (shorter pieces of fleece from shearing an area twice). Skirting is a crucial step in preparing your fleece for the mill. Most mills charge based on the incoming fleece’s weight, so skirting removes unusable waste like dirt and debris, reducing the weight and cost. Skirting a fleece takes time and energy, and it’s best to avoid windy days to prevent your fleece from blowing away—ask me how I know! In the future, consider making a skirting table, a frame with a screen that lets dirt and debris fall through. There are several YouTube videos on how to make your own like this one by Shepherd Industries .
Valais black nose sheep
photo credit- monikas_wunderwelt
2) Make a list of questions to ask the mill prior to sending your fleeces for processing.
What is the minimal and maximal staple length their equipment can handle?
Staple length is the length of lock or fiber from butt to tip.
Is there a minimum amount of fiber that is required to get processed ?
My local mill is a small operation and will work with small batches even if you only have one fleece to process.
What breeds of sheep the mill tends to process?
This turned out to be a very important question for me because Valais blacknose sheep is not a common breed here in Canada and this breed tends to have a long staple length. One of my fleeces could not be processed because it had a staple length greater than 8 inches.
my skirted wool fleece
What is the turn around time for processing your fleece?
The estimated time in my case will be 3 to 4 months which is fine since I still have fiber I can spin and it gives me time to brainstorm ideas . It could be worse considering some mills have a year turnaround time.
What processing services do they provide?
My options were limited to making a roving or batt or felted into sheets. This mill had only a picker, carder and felting machine onsite. Yarn can be done but it is sent to another mill. Some mills have services include dyeing and blending with other fibers.
Another useful tip I found is to prewash your fleece to save on costs, as approximately 30% of the dry weight is due to lanolin. If your fleece is very dirty, mills may charge an additional fee to clean it.
Since this is my first time processing a fleece, I’m sure I’m only scratching the surface of the topic. What I’ve learned so far has made me respect the labor-intensive process of converting fleece into yarn even more. While I know how much time it takes to make yarn, I’ve discovered there are many additional steps required to transform raw fleece into a spin-ready preparation. I admire handspinners who process their own fleece and might try it myself in the future. For now, I appreciate the opportunity to support local mills. Have you ever bought fleece and processed it yourself, or have you sent it out to a mill? Feel free to comment below.
When I started spinning yarn, people often asked why I bothered when it’s so easy to buy. It’s a fair question, and I often wish I could explain in detail why. So, here’s a brief reminder for myself and an invitation for others to understand why I love spinning yarn. I hope fellow handspinners can relate, and those curious about spinning will dive into this rewarding craft and get hooked, just like I did.
1) One of a Kind!
Handspun yarn stands out distinctly, bearing the unmistakable mark of human craftsmanship that is difficult to replicate by machines. This human touch, with its imperfections, adds character to the yarn, making it special. Why does this matter? When you use handspun yarn in any fiber craft, it adds a unique quality to the pattern and, consequently, to the final design of your project. For instance, last fall, I worked on a French weaving project, which I detailed in my blog post “Harvesting Creativity.” While the weaving pattern itself was beautiful, using handspun yarn made the pattern more prominent, enhancing the overall design.
handspun yarn
From time to time, I enjoy going through my collection of handspun yarn to remind myself of what I have and to motivate myself to use it more in my fiber crafts instead of just keeping it stored away. It’s a way for me to get excited about upcoming projects and, despite my attempts to envision the finished item, I’m always pleasantly surprised by how it turns out. Because handspun yarn is so unique, it’s difficult to predict how it will behave or which aspects of a design it will highlight, and I believe that’s part of its charm. I’m looking forward to using it in projects I haven’t tried before, like rug hooking, and I’ll be sure to update you when I do.
2) Variability
I appreciate the versatility that handspun yarn offers, particularly in terms of its variability. One key aspect for me is the size or thickness of the yarn. While commercial yarn comes in different weights or sizes, I can still achieve variability even within these weight classes. For instance, my favorite yarn to use, fingering weight (also known as 4 ply yarn), allows me to create a thicker version that borders on sport weight yarn, or I can go the opposite way and produce almost lace weight without spinning too fine.
Another aspect I enjoy is the ability to control the number of plies to achieve the desired thickness and sturdiness of the yarn. For example, when knitting socks, a 3-ply yarn is generally preferred over a 2-ply yarn because the additional strand provides more resilience against friction when the socks are worn.
Most importantly, the variability of color arrangement is key. Fibers can be divided at color changes and spun separately, or divided into thin strips and spun randomly. This encourages more blending of colors, creating visual interest in the yarn strands and ultimately enhancing the final handmade project.
3) Enjoyment!
Expressing the joy of spinning requires acknowledging both its technical aspects and its inherent fulfillment. While learning the technicalities may seem daunting at first, once you find your rhythm, spinning becomes truly enjoyable. This enjoyment extends into other fiber crafts like knitting or weaving with handspun yarn. The unique texture and feel of handspun yarn, distinct from commercial yarns, add to the pleasure of working with it. Moreover, the knowledge that you’re creating from scratch adds depth to the slow making journey, fostering a greater appreciation for the final product and the creative process itself.
2 ply handspun yarn
If it wasn’t clear from my earlier words, I truly believe that spinning yarn is worth the investment. While it may indeed be more expensive and time-consuming compared to buying commercial yarn, the unique qualities, variability, and enjoyment factor it offers are unparalleled. The satisfaction derived from creating something entirely unique and the joy it brings to future projects outweigh the cost considerations for me. I’m eager to hear your thoughts on spinning or working with handspun yarn. Please feel free to share your comments below.
Happy New Year, fellow makers! I hope you had a wonderful holiday season. Reflecting on 2023, I achieved many crafting goals, reconnecting with weaving and rug hooking. With the start of a new year, it’s time for fresh beginnings. I feel inspired to set new crafting goals and face new challenges in 2024. While I have exciting plans ahead, I also aim to complete lingering projects from previous years. As time passes, my project list has grown, and it’s time to make progress. Today, I want to share my crafting goals for 2024, hoping to stay focused and accomplish them!
1) Turning hand embroidered pieces into a complete finished object
I’ve been doing hand embroidery for a while now and I enjoy it immensely. It was my first venture into needlework and felt less daunting than cross-stitching. Taking an embroidery class on Craftsy for basic stitches helped too. I’d turn to this craft sporadically when I wanted something requiring less concentration but keeping my hands busy. Over the years, I’ve embroidered a small collection of 6-inch squares using designs from my favorite craft designers like Kathy Schmittz and Sarah Jane. Now, I’m pondering how to best arrange them into a project. I’ve checked the ‘Big Book of Hand Embroidery Projects’ for ideas, but I’m still uncertain about what to do next.
So what is holding me back from making a decision?
How to arrange them in a way to highlight each hand embroidered piece so they do not compete but still go well together.
Is it practical? Will I use it or store it away to collect dust.
I will have to design a layout especially if I plan to put into a wall hanging or mini quilt.
Decisions, decisions, decisions!!
6x6 inch embroidered pieces of linen
2) Practicing piecing and aiming for precision in quilting!
A few crafting friends and I decided to take on the Riley Blake Design Block Challenge this year, pushing me to explore more challenging aspects of quilting. I typically stick to standard piecing with straightforward stitching and minimal cutting. As I delve into the challenge, I’ve gone through my fabric stash, considering colors and deciding whether I need to add a couple more fabrics to achieve the desired finished quilt size of around 60 x 60 inches. I’ve successfully completed Block #1, Vintage Delight, piecing together various units to create an almost squared 10.5 x 10.5 block.
#RBDblockchallenge Vintage Delight quilting block
3) Weaving more with my handspun.
I’m expanding my weaving projects by using more of my handspun yarn to create fabric for future original designs, like small bags and household décor items. To accomplish this, I need to produce more handspun, but luckily, I have a good stash of fiber. Currently, I’m spinning some vibrant Corriedale fiber dyed by Funky Carolina, enjoying the colors as I spin. Additionally, I’ve acquired new fiber to spin. I’m considering spinning them as singles and then weaving them with another neutral-colored single-ply wool yarn, using a tight plain weave structure.
handspun yarn singles
4) Rug hooking an original design!
What is my original design involving? Of course, a sheep! Freestyling the drawing onto a piece of primitive linen foundation cloth using a sharpie, the design is approximately 6 x 6 inches and is intended to become a small wall hanging for my craft room. I plan to use leftover wool strips from a previous project, specifically hooking a sheep from the Buttermilk Basin pattern called Patriotic Sheep. Despite struggling to shift focus from this enjoyable project to complete others, it has inspired me to design more rug hooking patterns soon.
my rug hooking sheep design
These projects represent just a few on my to-do list for 2024, and I’m excited about completing them and sharing the finished pieces with you. Despite having a list, I’m leaving room for new inspiration and creativity to emerge. That’s the fun part of crafting – seeing where it takes you. Most of the time, it turns out better than you can ever imagine. What are your crafting goals for this new year? Please feel free to leave a comment below.
Music: Passage by Jakob Ahlbom & Trust in You by AK Silla
Nature is my go-to source of inspiration, regardless of the season. However, I must admit that the changing colors of leaves, the bright autumn afternoon sun, and the pine needles covering the forest grounds rekindle my imagination. I have a strong desire to recreate the mood of comfort, stillness, and crispness that I experience during my woodland walks in the fall. What crafts am I gravitating towards this fall to reflect this change of pace?
Rug Hooking
My current rug hooking project is from an older Buttermilk Basin pattern called Patriotic Sheep. Using primitive cut wool strips (1/4 inch wide strips of wool) in rustic colours such as burgundy, mossy greens and burnt yellows. As you can see, I still have the main body to work on. I have a variety of creams and white wool fabric waiting to be felted and cut into strips. The final project will be a 3-dimensional sheep that will hopefully decorate my craft room.
rug hooking sheep
Weaving
Weaving with my multicolored handspun using a crackle weaving structure. The pattern is called the French pattern, and it is from Marguerite Porter Davidson’s book, A Handweaver’s Pattern Book. This book has a great compilation of older weaving patterns, but using this pattern along with my multicolored handspun is giving this old pattern new life while preserving the vintage feel and look. I will admit my initial choice of a gray color was more subdued, but I am glad I changed my mind. This fall season is bursting with color, and I wanted my current projects to reflect this.
using my handspun to weave the French Pattern
Knitting
Knitting socks during this time of year, I am obsessed with staying warm and what I can make that will keep me warm. Naturally, my feet are the first part of my body that get cold quickly, and it is not even below 0 degrees. I start rummaging through my yarn stash to find the perfect yarn that is sturdy and warm enough to start a new pair of socks. Then, I finish all the last year’s sock projects by closing the toes and weaving all the loose ends.
striped hand knitted knee high socks
Punch needle
It is not a craft that I often work on, but I do enjoy it immensely when I do. This pattern is a Michelle Palmer original punch needle design, and of course, I was drawn to it because of the cute sheep design. It was featured in a summer 2019 issue of the Punch Needle and Primitive Stitcher magazine, but I felt the color selections in this design reminded me more of fall leaves that decorate the forest floor instead of summer flowers in full bloom. I have the pattern stretched on some wooden bars for increased accessibility while I am cuddled under some blankets and sipping on a hot cup of tea.
punch needle sheep design by Michelle Palmer
Quilting
I find binding quilts takes a long time when I make blankets. But it feels good to be under the blanket while doing it. I usually bind quilts in the fall, after piecing them together during the summer when there’s more daylight. It gets too hot to manoeuvre the blanket while hand-sewing the edges. I feel good when I finish because I have a new blanket to keep me cozy during the winter while I work on other crafts.
What crafts are you drawn to when there is a change of season, especially when the weather gets cooler? Please feel free to comment below!
I have been spinning since 2011 and I would spin for hours daily.I was addicted and couldn’t fathom taking a break. Unbelievably, I went an entire year without spinning. This unexpected pause happened because the drive band on my spinning wheel broke, and I needed to replace it. I’d used the same band for over 8 years, so its breakage was inevitable. Nothing lasts forever! Long story short, it took a year to fix my Majacraft Little Gem II spinning wheel, and when I could finally spin again, I felt a mix of excitement and doubt. I questioned if I still knew how to do it. The good news is that this story has a happy ending. I got reacquainted with my spinning wheel by following these five steps:
1) Practice peddling first!
Yup just like how you learned to spin the first time I recommend just start peddling. Old age saying: Practice makes perfect is true! Patience is not my strongest virtue so you can imagine I wanted to skip this step all together and start making yarn. But just like how my spinning guru (Lori, from the Black Lamb) taught me in the beginning it is an essential step if you want to establish a rhythm while spinning. Yes, I had to get my groove back and guess what I still have rhythm. How long should you just practice peddling? There is no hard and fast rule! Keep peddling until you feel comfortable with your spinning wheel.
2) Pick a wool fiber that is easy to spin
One with a longer staple length and where all the fibers are aligned in the same direction. The more basic wool preparations (roving with no mixed blends of fiber types such as superwash merino cashmere blend) the better control you have while drafting because they are less slippery to work with. You can just focus on learning how to draft again in rhythm with the peddling of your wheel. Now I have every intention to return to my luxurious fiber blends because they are heavenly to spin with, even better to knit with and plus I still have a big fiber stash to get through.
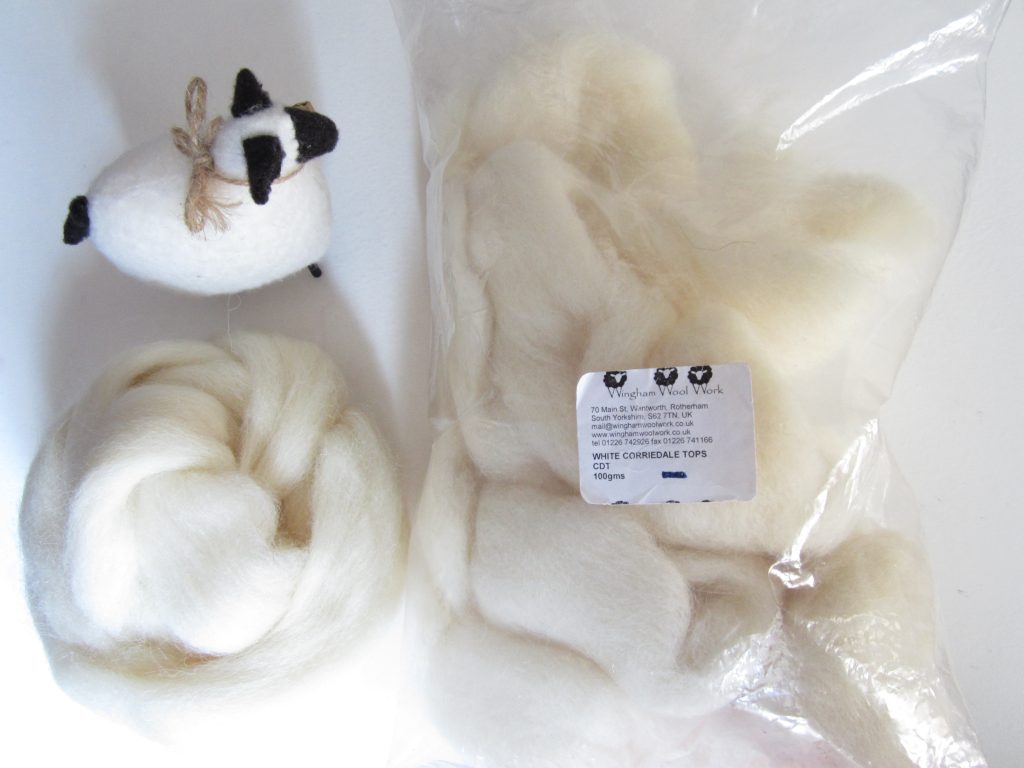
I received some awesome white wool from Wingham Wool Work through a fiber swap on Ravelry – such a thoughtful gift from my swap partner. I decided to work with the white wool to see how consistent I could make my spinning, which is important to me so that I can create even and consistent yarn. While I know using multicolored wool would have been more fun, I wouldn’t have been able to gauge the consistency of my yarn spinning. Plus, consistent spinning means that I can knit uniformed stitches, which is always a plus. Can’t wait to see what I’ll create with this yarn!
3) Reduce brake band tension
Readjust your brake band tension such that the wheel (specifically the flyer) does not fill the bobbin with the yarn as quickly and allow you enough time to draft properly. That way you are not fighting with the wheel. Keeping a consistent rhythm is challenging enough on your first go.
4) Create a relaxing environment
Can I be honest with you? I was nervous, which makes my muscles, especially my hands, tense up and grip my fiber supply tightly. This isn’t good for spinning because it leads to fiber entanglement and makes drafting difficult. Smooth drafting is crucial for creating consistent singles, which, in turn, helps produce beautiful 2 or 3 ply yarns. To ease my nerves, I set up a relaxing environment with a diffuser filled with calming essential oils and silence; no electronics, which I used to have when spinning.
5) Take breaks!
It is a good idea to step away from the wheel time to time. It allows you to re-evaluate what you have done. You might want to adjust how you are sitting or reposition the orientation of the orifice or even the tension on your wheel for the next spinning session.
The question, “Can I start spinning again?” can definitely be answered with a resounding “Yes.” All it required was establishing a rhythm, selecting the right fiber, adjusting tension, staying calm, and taking breaks. Handspinners often have various methods to reconnect with their spinning wheel, whether an old one or a new addition to their collection. My goal as a handspinner was rediscovering the joy of spinning, rather than delving into technical and analytical aspects. I find the most enjoyment in spinning when I’m fully present in each drafting moment. After spinning the singles, I consider how to ply them or sometimes let the singles sit while I work on another fiber. It’s a slow, satisfying journey, and I’m content as long as I’m in my spinning groove. If you’ve taken a break from spinning, please share your experiences and methods for getting back on track in the comments below!