Harvesting Creativity: Crafting This Fall Season

Music: Passage by Jakob Ahlbom & Trust in You by AK Silla

Nature is my go-to source of inspiration, regardless of the season. However, I must admit that the changing colors of leaves, the bright autumn afternoon sun, and the pine needles covering the forest grounds rekindle my imagination. I have a strong desire to recreate the mood of comfort, stillness, and crispness that I experience during my woodland walks in the fall. What crafts am I gravitating towards this fall to reflect this change of pace?

Rug Hooking

My current rug hooking  project is from an older Buttermilk Basin pattern called Patriotic Sheep. Using primitive cut wool strips (1/4 inch wide strips of wool) in rustic colours such as burgundy, mossy greens and burnt yellows. As you can see, I still have the main body to work on. I have a variety of creams and white wool fabric waiting to be felted and cut into strips. The final project will be a 3-dimensional sheep that will hopefully decorate my craft room.

rug hooking sheep
rug hooking sheep

Weaving

Weaving with my multicolored handspun using a crackle weaving structure. The pattern is called the French pattern, and it is from Marguerite Porter Davidson’s book, A Handweaver’s Pattern Book. This book has a great compilation of older weaving patterns, but using this pattern along with my multicolored handspun is giving this old pattern new life while preserving the vintage feel and look. I will admit my initial choice of a gray color was more subdued, but I am glad I changed my mind. This fall season is bursting with color, and I wanted my current projects to reflect this.

hand weaving
using my handspun to weave the French Pattern

Knitting

Knitting socks during this time of year, I am obsessed with staying warm and what I can make that will keep me warm. Naturally, my feet are the first part of my body that get cold quickly, and it is not even below 0 degrees. I start rummaging through my yarn stash to find the perfect yarn that is sturdy and warm enough to start a new pair of socks. Then, I finish all the last year’s sock projects by closing the toes and weaving all the loose ends.

pair of handknitted socks
striped hand knitted knee high socks

Punch needle

It is not a craft that I often work on, but I do enjoy it immensely when I do. This pattern is a Michelle Palmer original punch needle design, and of course, I was drawn to it because of the cute sheep design. It was featured in a summer 2019 issue of the Punch Needle and Primitive Stitcher magazine, but I felt the color selections in this design reminded me more of fall leaves that decorate the forest floor instead of summer flowers in full bloom. I have the pattern stretched on some wooden bars for increased accessibility while I am cuddled under some blankets and sipping on a hot cup of tea.

sheep punch needle
punch needle sheep design by Michelle Palmer

Quilting

I find binding quilts takes a long time when I make blankets. But it feels good to be under the blanket while doing it. I usually bind quilts in the fall, after piecing them together during the summer when there’s more daylight. It gets too hot to manoeuvre the blanket while hand-sewing the edges. I feel good when I finish because I have a new blanket to keep me cozy during the winter while I work on other crafts.

What crafts are you drawn to when there is a change of season, especially when the weather gets cooler? Please feel free to comment below!

Reigniting My Spinning Groove: Learning How to Spin Yarn Again!

Music:  Wonders Abound by  Joyspring

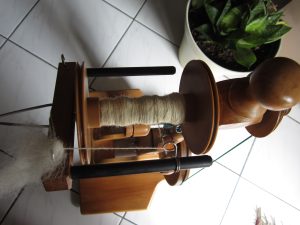
I have been spinning since 2011 and I would spin for hours daily.I was addicted and couldn’t fathom taking a break. Unbelievably, I went an entire year without spinning. This unexpected pause happened because the drive band on my spinning wheel broke, and I needed to replace it. I’d used the same band for over 8 years, so its breakage was inevitable. Nothing lasts forever!  Long story short, it took a year to fix my Majacraft Little Gem II spinning wheel, and when I could finally spin again, I felt a mix of excitement and doubt. I questioned if I still knew how to do it. The good news is that this story has a happy ending. I got reacquainted with my spinning wheel by following these five steps:

1) Practice peddling first!

Yup just like how you learned to spin the first time I recommend just start peddling. Old age saying: Practice makes perfect is true! Patience is not my strongest virtue so you can imagine I wanted to skip this step all together and start making yarn. But just like how my spinning guru (Lori, from the Black Lamb) taught me in the beginning it is an essential step if you want to establish a rhythm while spinning. Yes, I had to get my groove back and guess what I still have rhythm. How long should you just practice peddling?  There is no hard and fast rule! Keep peddling until you feel comfortable with your spinning wheel.

spinning wheel

2) Pick a wool fiber that is easy to spin

One with a longer staple length and where all the fibers are aligned in the same direction.  The more basic  wool preparations (roving with no mixed blends of fiber types such as superwash merino cashmere blend) the better control you have while drafting because they are less slippery to work with. You can just focus on learning how to draft again in rhythm with the peddling of your wheel.  Now I have every intention to return to my luxurious fiber blends because they are heavenly to spin with, even better to knit with and plus I still have a big fiber stash to get through.

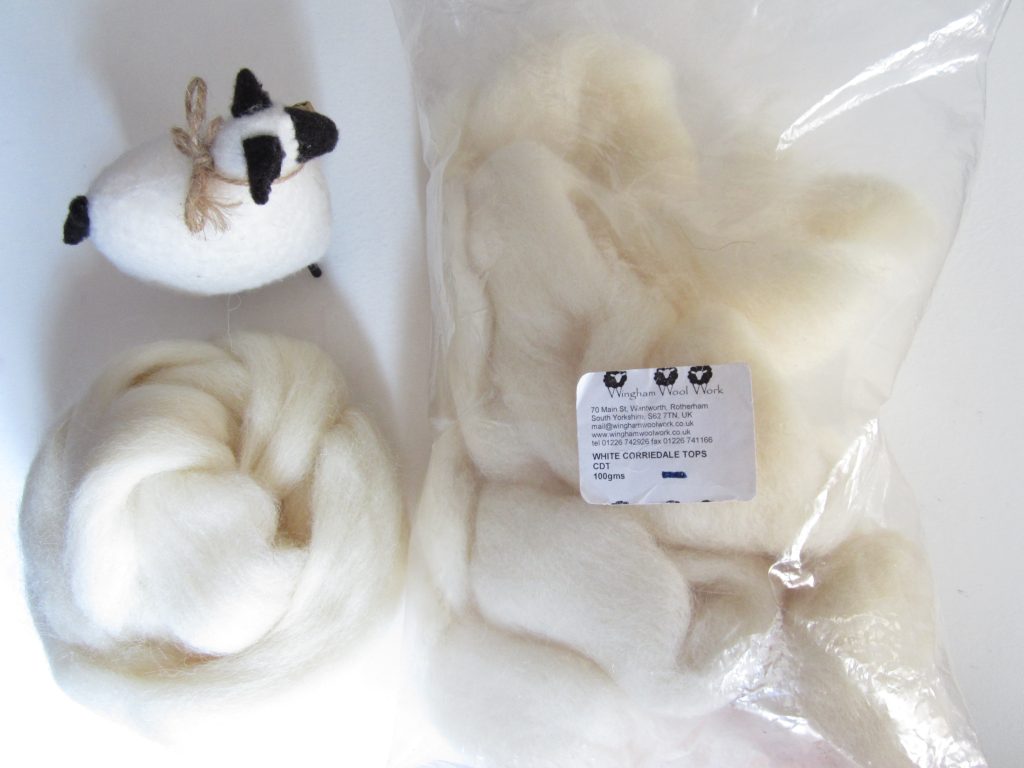
wool roving fiber

I received some awesome white wool from Wingham Wool Work through a fiber swap on Ravelry – such a thoughtful gift from my swap partner. I decided to work with the white wool to see how consistent I could make my spinning, which is important to me so that I can create even and consistent yarn. While I know using multicolored wool would have been more fun, I wouldn’t have been able to gauge the consistency of my yarn spinning. Plus, consistent spinning means that I can knit uniformed stitches, which is always a plus. Can’t wait to see what I’ll create with this yarn!

3) Reduce brake band tension

Readjust your brake band tension such that the wheel (specifically the flyer) does not fill the bobbin with the yarn as quickly and allow you enough time to draft properly. That way you are not fighting with the wheel. Keeping a consistent rhythm is challenging enough on your first go. 

4) Create a relaxing environment

Can I be honest with you? I was nervous, which makes my muscles, especially my hands, tense up and grip my fiber supply tightly. This isn’t good for spinning because it leads to fiber entanglement and makes drafting difficult. Smooth drafting is crucial for creating consistent singles, which, in turn, helps produce beautiful 2 or 3 ply yarns. To ease my nerves, I set up a relaxing environment with a diffuser filled with calming essential oils and silence; no electronics, which I used to have when spinning.

5) Take breaks!

It is a good idea to step away from the wheel time to time. It allows you to re-evaluate what you have done. You might want to adjust how you are sitting or reposition the orientation of the orifice or even the tension on your wheel for the next spinning session.

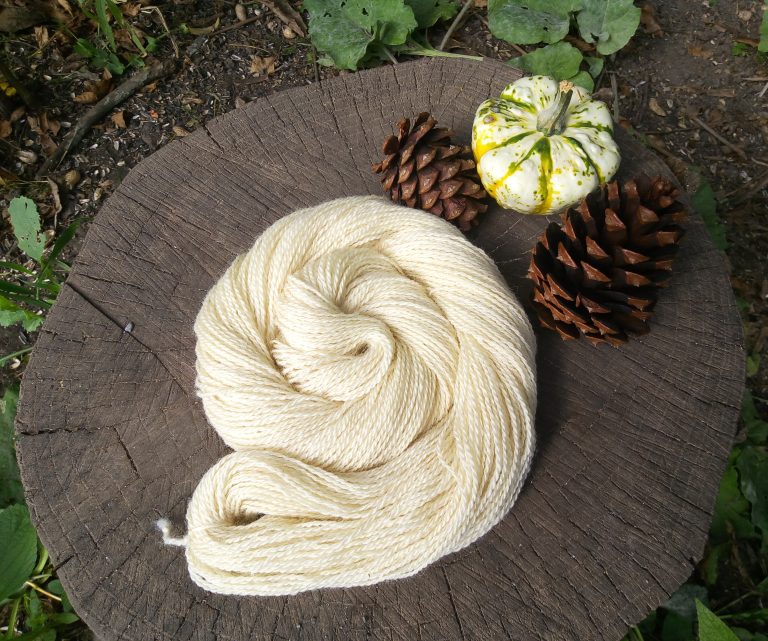
handspun yarn

The question, “Can I start spinning again?” can definitely be answered with a resounding “Yes.” All it required was establishing a rhythm, selecting the right fiber, adjusting tension, staying calm, and taking breaks. Handspinners often have various methods to reconnect with their spinning wheel, whether an old one or a new addition to their collection. My goal as a handspinner was rediscovering the joy of spinning, rather than delving into technical and analytical aspects. I find the most enjoyment in spinning when I’m fully present in each drafting moment. After spinning the singles, I consider how to ply them or sometimes let the singles sit while I work on another fiber. It’s a slow, satisfying journey, and I’m content as long as I’m in my spinning groove. If you’ve taken a break from spinning, please share your experiences and methods for getting back on track in the comments below!

The Great Showdown: Hand Quilting vs Machine Quilting

Music: I Remember Well by Cody Francis

Hand Quilting Won this Round!

Are you guilty of having a pile of wips! I have a pile for every craft. I try to keep them at a minimum, but I often fail. I can be easily distracted like a squirrel with a shiny new object with the other new exciting projects that I want to work on right away. Recently I rediscovered a quilting project using leftover fabrics scraps from an adorable fabric line from Dashwood. The quilt top was finished and it was intended to be sold as a baby quilt in my Etsy shop. The next step was to quilt this beauty either by sewing machine or by hand. Time was not a factor in this decision. I knew for certain that I wanted to accentuate the beautiful bright bold colours in this quilt. When I checked my machine thread collection it was mainly neutral colours but I desired colours that were BOLD and BRIGHT. I felt this look could be achieved by using thicker weight thread called perle cotton which I use often in my hand embroidery. After a brief Google search and watching a YouTube video on big stitch quilting, I decided that hand quilting was the perfect choice. Here are my reasons for choosing hand quilting for this project: 

1) Stitching was more defined

The thicker thread stood out more especially against the bold, intense fabric colours. I used perle 8 embroidery thread (equivalent to 2 strands of embroidery floss held together) instead of the larger size, perle 5 (equivalent to 6 strands of embroidery floss held together) because it was less overwhelming to the eye. I used clover’s embroidery needle size #10 to thread the needle. The brand of threads used were a combination of DMC and Wonderfil which I purchased either from my local quilting shop, The Country Clothesline or Michaels.

2) Switch thread colours quicker

With threading several embroidery needles at once, I was able to switch thread colours quickly vs changing bobbin thread and spool of thread for every ½ triangle I was going to hand quilt. Plus, if I accidently used the wrong colour, for example using the same colour as the adjacent 1\2 triangle, it was quicker and easier to pull the stitches out without reaching for my handy dandy seam ripper. Even though the concept of hand quilting conjures the image of slow stitching, I found that it did not take as much time because I was making bigger stitches and covering a lot of space in a short of period.

embroidery thread
Perle cotton embroidery thread

3) Creates a whimsical organic look or unique factor

Handmade items have a unique human touch, which brings subtle imperfections that can make items more distinct and organic. Naturally your stitching will look different based on how you feel. When I feel stressed, my stitches look tighter and closer together than when I am relaxed. If you want your stitching to look even, mark dots evenly with an erasable pen such as Sewline and Fixxon and a ruler. Test the pen on extra fabric first to make sure you can remove the marks if needed. If you forget to test, it’s not a big deal – the thread will probably cover the marks.  You see another a bonus for using perle cotton thread for quilting. For those who have Natalie Chanin’s book, “The Geometry of Handsewing,” there’s an added benefit. The plastic templates found in the book can serve as valuable guides for achieving the desired spacing and patterns. This insightful tip was inspired by Quilters Candy.

4) Very portable!

I didn’t have to sit at my sewing machine, which lives in my dining room that’s more of a craft room now. I hardly dine in there now and the number of sewing supplies outnumber the china and refined cutlery in my china cabinet. I used a 11 x 11 q-snap frame while I was quilting. The set up was light and portable, allowing me to even quilt comfortably in bed. And in case you’re wondering, no, I didn’t fall asleep – that would be quite the scary scenario, right? Falling asleep with a sharp needle in hand (ouch!). The portability of hand quilting was a welcome change because it spared me the battle with my sewing machine, which has a narrow throat space. Trust me, most of the time, I lose that battle.

5) Living in the Moment

Slow stitching is a mindful activity. I am conscious of every stitch I make. Personally,  I can have moments where my mind will drift off while I am machine quilting because I do not have to be too engaged since the machine is doing bulk of the work. Now an argument could be made that free form machine quilting could be more mindful since you are more involved in the quilting process as you are thinking about the pattern you are designing in the quilt. However, I enjoy the process more of hand quilting because it feels more intentional and this is important for me when I am creating.

Each time I look at my finished quilt, I realized I made the right choice to hand quilt. The fun bold colours in the fabric and thread choices make the quilt looks so unique and whimisical. 

What is your go-to method for quilting? hand quilting or machine quilting? Leave a comment below. 

Until next time, keep making the things you love!

hand quilting baby blanket
Finished hand quilted blanket