July began with an exciting visit to a Twin Alpaca Farm and Fiber Mill in Millbrook, Ontario, organized by my local handweaving and spinning guild. On the first Saturday of the month, I arrived at the farm on a sunny day, greeted by green pastures and alpacas roaming around. It was my first time visiting a farm that raises alpacas and processes their fiber on-site. The farm also had a store selling roving, yarn, and handmade items made from alpaca fleece. In this blog post, I’ll share some highlights of my visit and how I’ve used alpaca fiber in my projects.
1) How Alpacas are raised
The first part of the tour focused on how they raise their Huacaya alpacas. Unlike suri alpacas, Huacayas have fleece that is fluffy and dense, similar to wool. The alpacas are shorn once a year, and they had been recently shorn when we visited. The farmers emphasized the importance of good husbandry, including a nutrient-dense diet and regular shearing, to produce high-quality fleece. This is important to consider when buying alpaca fleece, as a farm’s primary objective (whether for food, fleece, or hobby) influences their care practices. For hand spinners, good quality fleece is essential for an enjoyable spinning process and a beautiful final product. It was reassuring to hear that this farm prioritizes producing great fleece.
During the tour, we got to feed the alpacas oats. Initially cautious, the alpacas eventually approached us for the treat. Despite my initial apprehension about these relatively large animals (I’m barely 5 feet tall) approaching, it was a calming and enjoyable experience.
The farmers can identify each alpaca by sight, and the alpacas respond to their names. Alpacas come in up to 50 natural shades, eliminating the need to dye their fiber. Their fleece has a staple length (cut end to the tip of the lock) of 3 to 4 inches, ideal for hand carding, an important factor to keep in mind when considering to process their fleece by hand.
huacaya alpacas
2) How Alpaca Fleece is Processed
Earlier this year, I visited a fiber mill called Wool 4 Ewe. This mill, primarily run by Barb, one of the Twin Alpaca owners, operates at full capacity nearly year-round, except in January and February. The mill has extensive equipment, including a dehairing machine and a spinning/plying machine to make yarn.
The alpaca fleece goes through the same milling process as sheep fleece, involving steps like picking and carding. The dehairing machine removes guard hairs from the alpaca fleece, which cause fuzziness, resulting in a smoother and shinier yarn. The mill typically produces DK and worsted weight yarn.
I discovered that using the spinning machine to achieve the desired final yarn is somewhat of an art, similar to hand spinning. Often, alpaca fleece is blended with other fibers, such as merino, bamboo, and silk, to enhance the yarn’s stability.
spinning machine used to make yarn
3) How I have used alpaca in my crafting journey
* Spun alpaca fleece to make yarn
A year ago, I was gifted a 2-ounce alpaca batt from a farm called Shear Joy Alpacas. I spun it into a semi-worsted 2-ply sport weight yarn. Initially, I planned to keep it as singles, but plying them together created an interesting marled effect. I intend to weave this handspun yarn with other commercially processed alpaca yarn to have enough yardage for a blanket. Since alpaca yarn has a nice drape and is super soft, it will make a cozy throw for the cooler months.
handspun yarn from alpaca fleece
* Crochet a blanket
I started making a blanket with alpaca yarn about 10 years ago. Using a commercial alpaca and wool blend in teal, I began crocheting the Hexagon Panel Afghan by Marcia Walton. It’s still a work in progress, but I recently downloaded the pattern again to continue and hopefully finish it sometime this decade LOL!
alpaca wool blend crochet blanket panel
The alpaca tour reminded me to broaden my interests beyond just wool in my crafting journey. Its soft texture could add a nice touch to many handmade items. I’m excited to learn more about it as opportunities come up. Have you worked with alpaca fiber? If so, what did you make and did you enjoy it? Please share your thoughts in the comments below.
Natural dyeing has always interested me. Using plants to dye feels like a way to connect with nature. I was intimidated by dyeing wool, so I hoped a workshop would help me start. When that didn’t happen, a friend encouraged me to try it on my own. So, I did and decided to share my journey with you. I researched natural dyeing at my library and found great resources like A Garden to Dye for by Chris McLaughlin and Natural Kitchen Dyes by Alicia Hall. These books gave me the basic information I needed, and I chose rhubarb leaves for my first dyeing project since they were easy to find. Here are the steps I took to dye 100% wool worsted weight yarn with rhubarb leaves.
Step #1- Harvest Rhubarb leaves
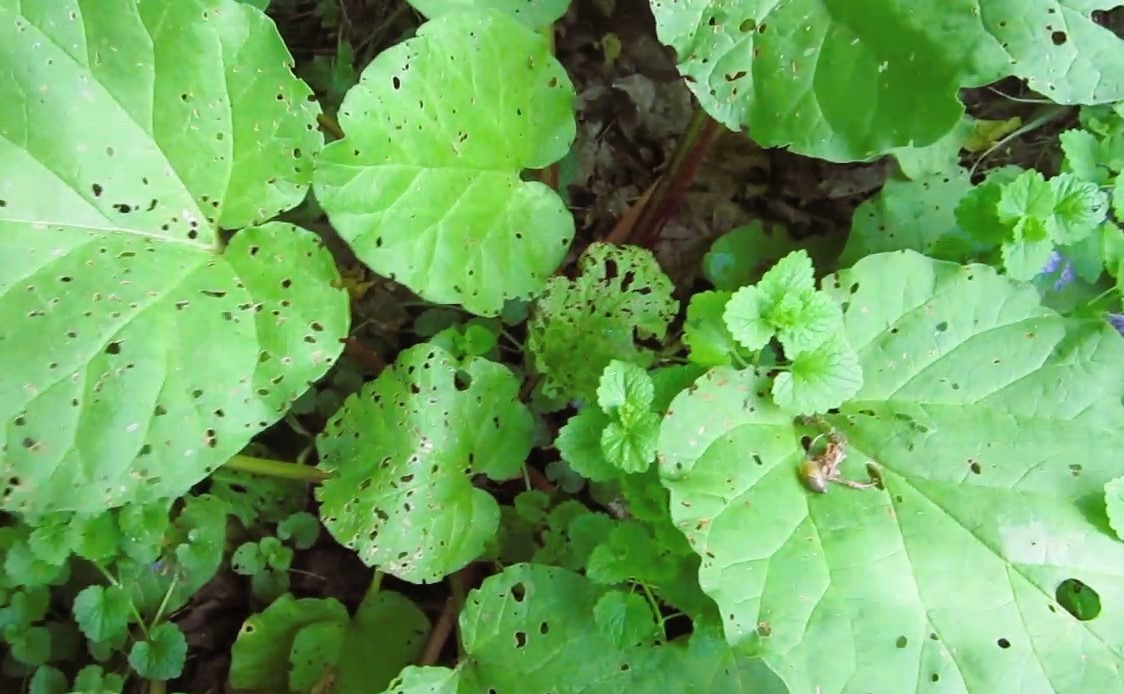
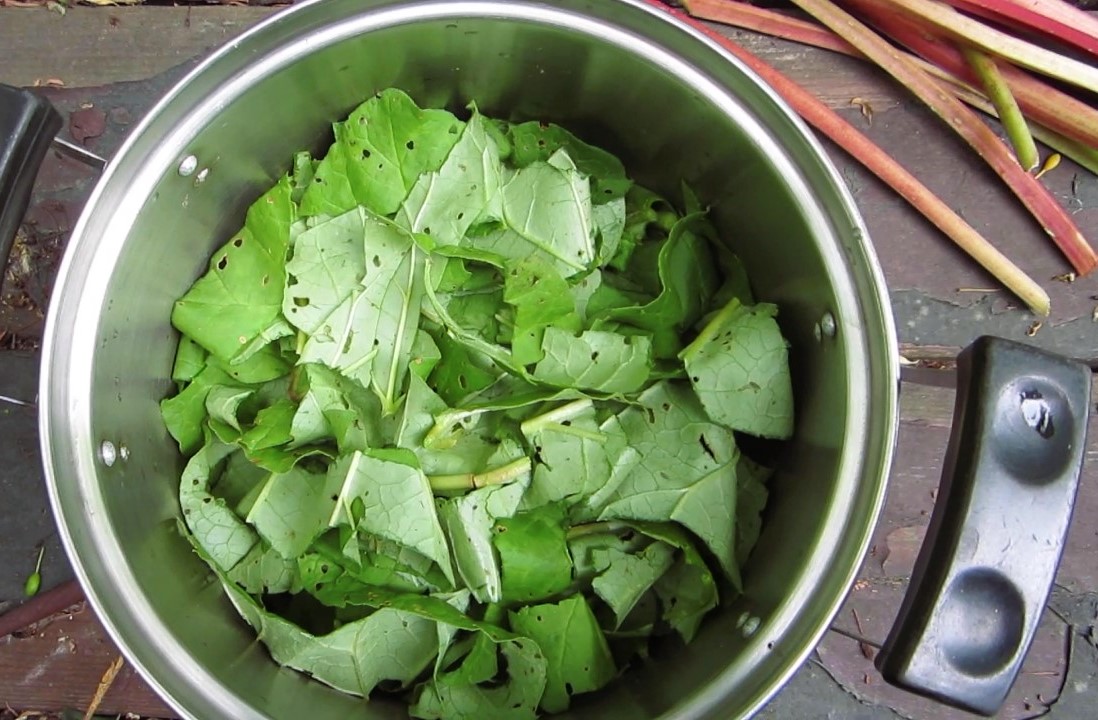
I was eager to start natural dyeing right away, so I looked for an abundant plant to use. Rhubarb was in peak growth, and while I’m not a gardener and plants tend to wilt around me, my friend had some rhubarb in her garden. She gladly shared some with me. My research showed that fresh rhubarb leaves were best for dyeing, so I quickly cut them into smaller pieces. To achieve a good color saturation, I needed a 1:1 ratio of fresh leaves to the weight of dry fiber (WOF). The expected color from rhubarb leaves is mustard yellow if the water’s pH is neutral (pH 7). While my resources explained modifying colors by reducing or increasing pH values, I focused on mastering the basics first.
I chopped up the leftover rhubarb roots and stored them in the freezer for future use. Rhubarb leaves can act as a mordant, which helps the color adhere to the fiber, but I used them solely for their color. To ensure a deeper mustard yellow, I decided on a 2:1 ratio. My wool fiber weighed 114 grams, and the rhubarb leaves weighed 192 grams, which was close enough for me since I rarely measure exactly.
Step 2: Preparing the dyebath
I used a stainless steel pot with a lid, dedicated solely to dyeing, as rhubarb leaves contain poisonous oxalic acid. The pot was large enough to hold the chopped leaves and enough water to cover them. I heated the pot until the dyebath gently boiled, then reduced the heat to let it simmer for an hour. I kept the lid on during this time and ensured proper ventilation by keeping the windows open.
After an hour, I removed the pot from the stove and set it aside. Though this wasn’t my original plan, I ended up leaving it for two days due to a busy schedule. This extra time allowed more dye to be extracted from the leaves, turning the dyebath from a golden yellow to a dark mustard yellow.
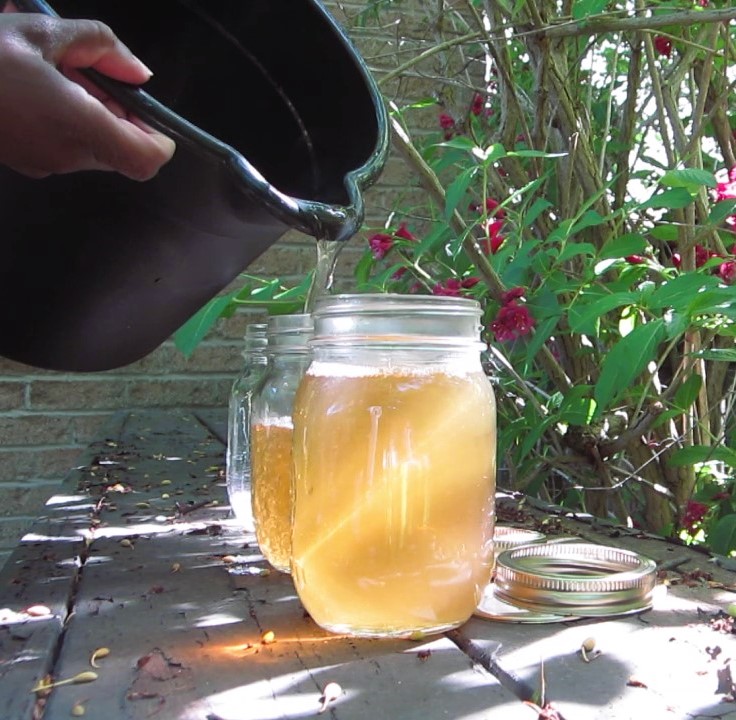
I strained the dyebath using a metal sieve and poured the liquid into mason jars for storage in the fridge. The total volume of the dyebath was 2.854 liters.
chopped rhubarb leaves for natural dyeing
pouring finished rhubarb leaves dyebath for natural dyeing
Step # 3: Preparing the wool for dyeing
It is recommended to scour your wool first to remove any substances that might prevent the dye from adhering properly. Although my wool yarn was relatively clean, I still used a gentle wool wash (Eucalan) and let it soak for 20 minutes before rinsing it with cool water. Then, I prepared a lukewarm water bath and let the yarn soak for at least an hour before dyeing, as wet yarn absorbs dye better.
Step # 4: Dyeing the wool in the rhubarb leaves dyebath
I poured all of the dyebath solution and the pre-soaked wool yarn into a stainless steel pot and covered it with a lid. I brought it to a gentle boil, then reduced the heat and let it simmer for an hour. During this time, I gently pushed the yarn deeper into the dyebath only twice to avoid felting it. After an hour, I removed the pot from the burner and let it cool before extracting the yarn. At first glance, the yarn had completely taken up the mustard yellow color.
Step #5: Rinsing and Finishing the natural dyed yarn
Rinsing the yarn was the most nerve-wrecking part. I rinsed the yarn using water at the same temperature it was resting in until the water ran clear. I was anxious to see if the deep mustard color would stay or fade to a pale yellow. To my surprise, most of the deep mustard color remained, and it didn’t take more than 10 minutes for the water to become clear. I decided to soak it in Eucalan for another 10 minutes and rinse it again. Only a small amount of dye ran off this time. After a final rinse, which took less than a couple of minutes, I hung the yarn to dry.
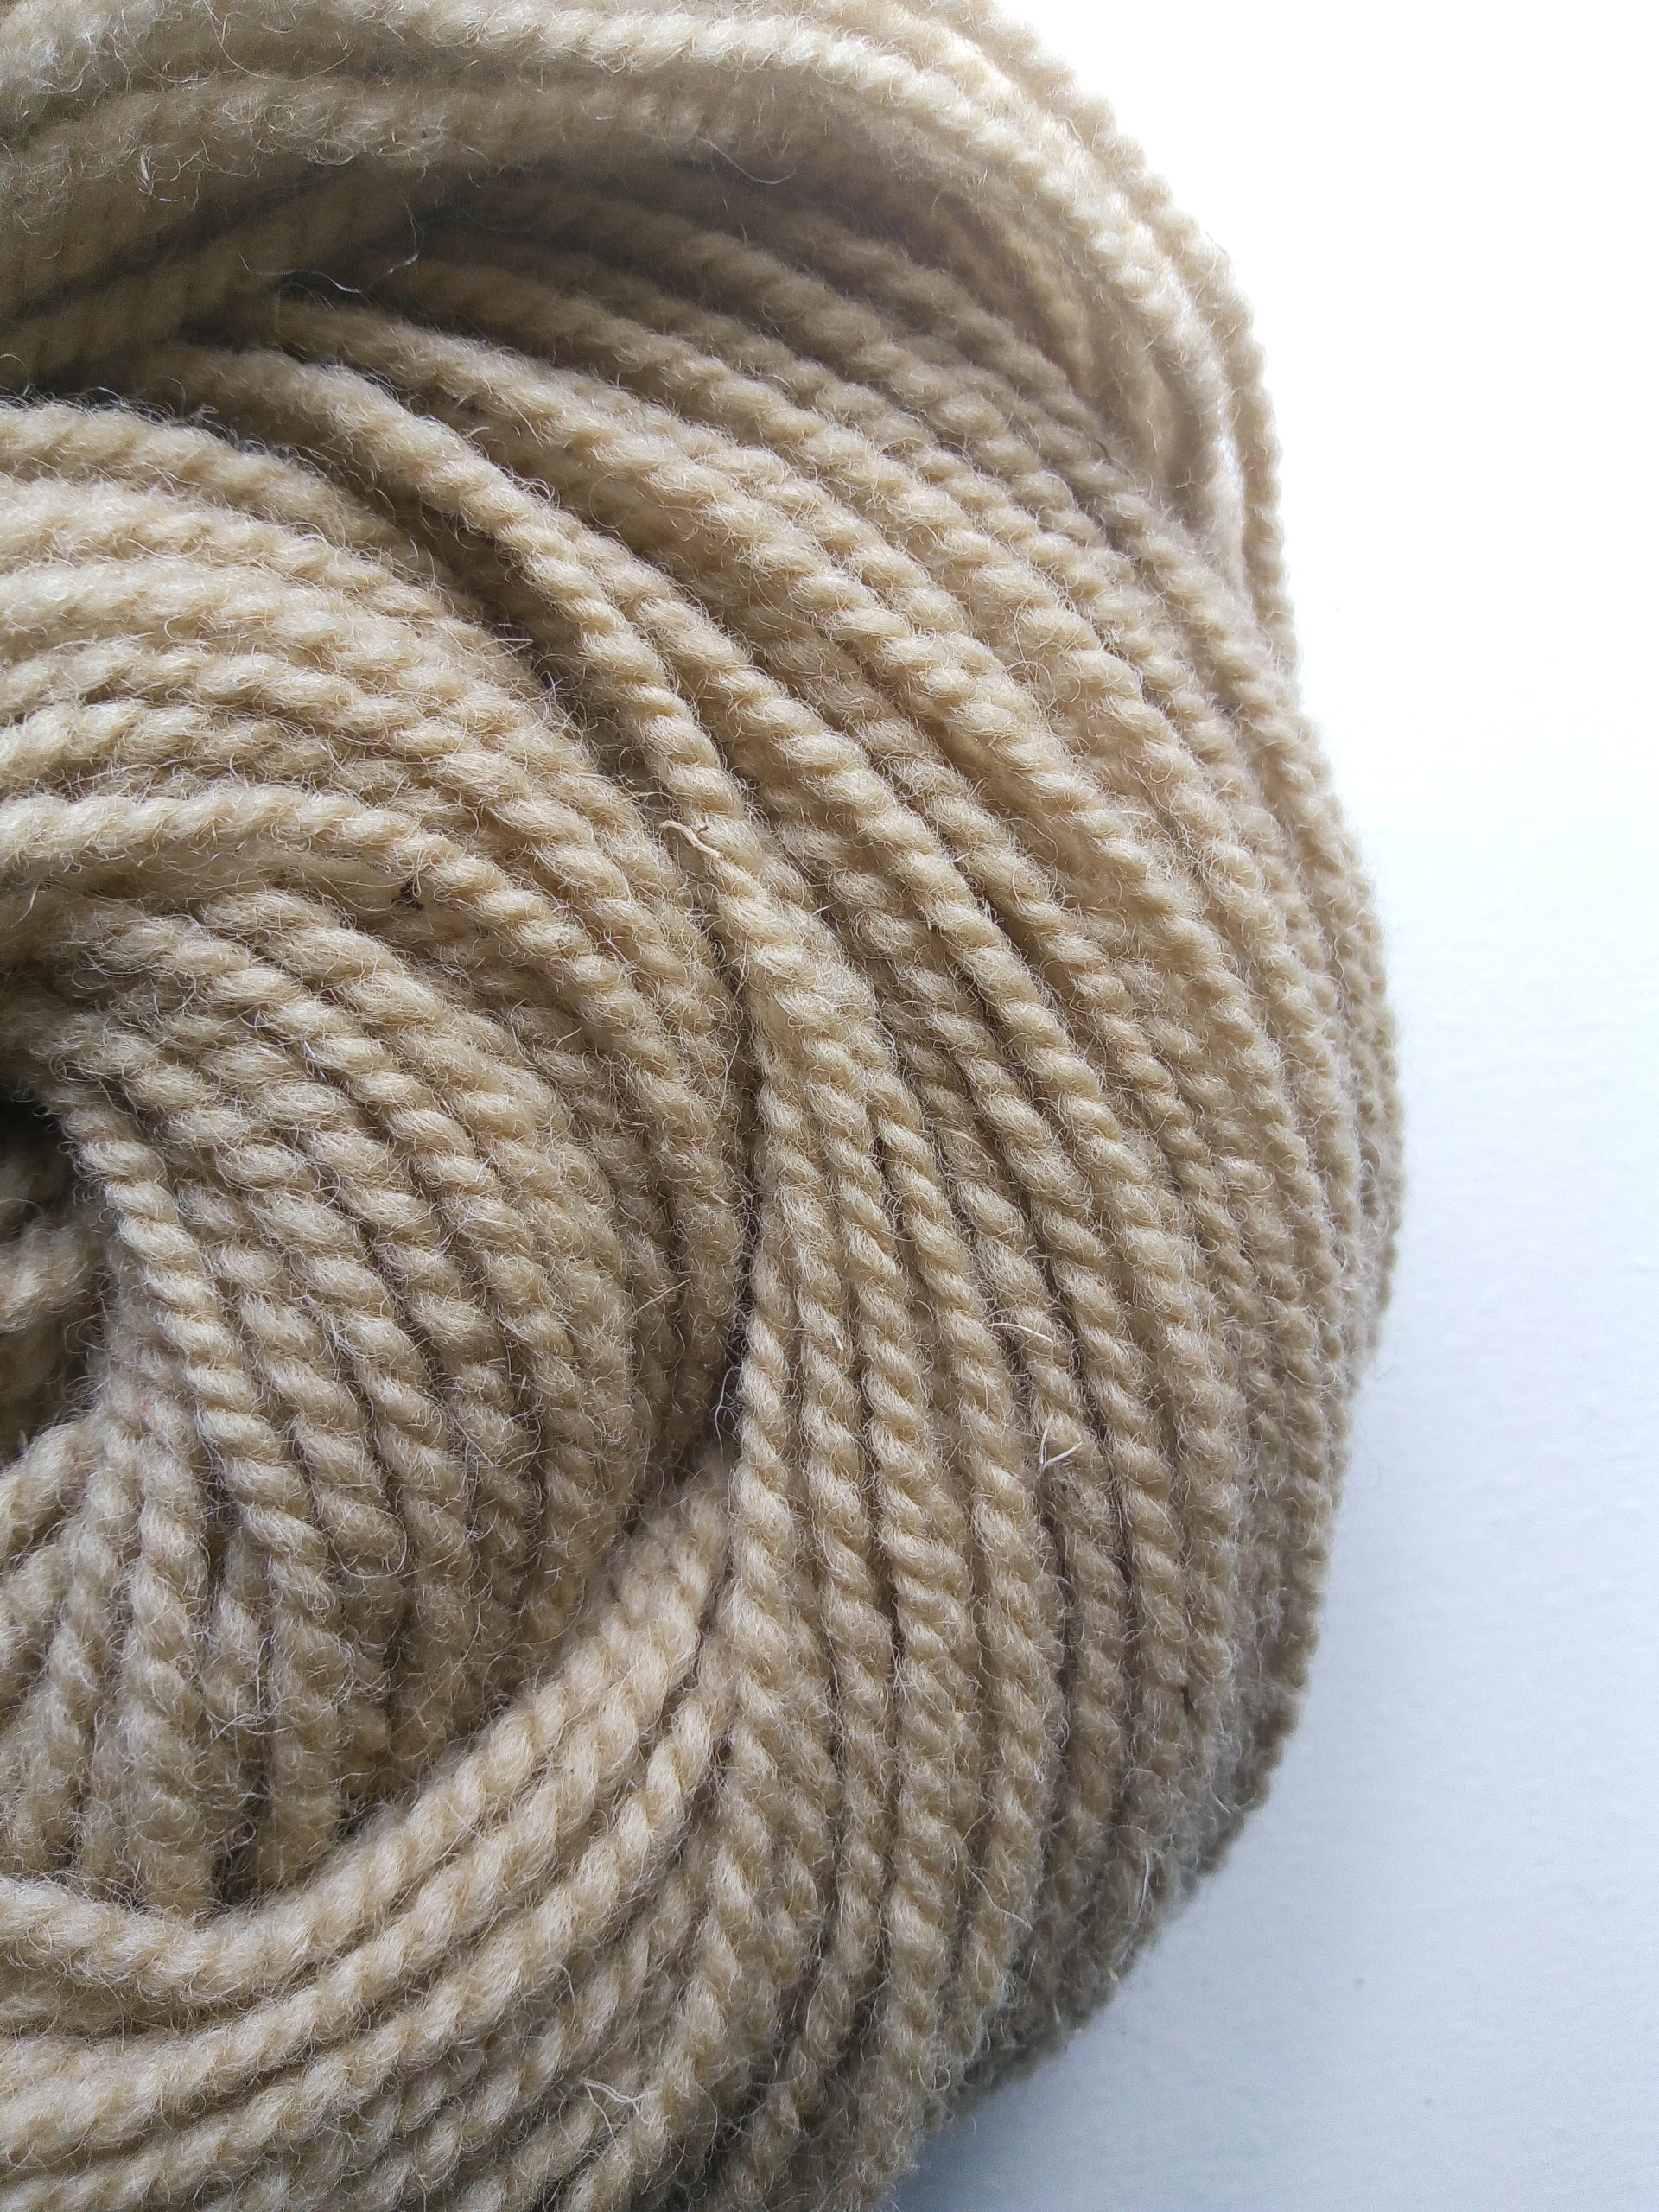
Ta! Da! Here is my first naturally dyed yarn and it turned out pretty good 😊
naturally dyed yarn with rhubarb leaves
Was I intimidated when I first started this process? Absolutely. Despite my fear of failing, I went for it and am very proud of the results. Even if it had gone wrong, it wouldn’t have been the end of the world. It took little time and resources, and most importantly, I had fun. I plan to continue sharing my natural dye journey, with future projects using onion skins, avocado skins and pits, and more. Have you tried dyeing your yarn or fabric before? Feel free to comment below.
I unexpectedly received some Valais Blacknose sheep fleece as a generous gift from a new shepherd, introduced by a mutual friend who knew I was a handspinner and weaver. These sheep are famously cute; just Google “cutest sheep in the world” to see them. Our friend texted me, asking if I wanted the fleece, and I quickly replied, “yes.” A few days later, I received the beautiful wool fleece bundles and started thinking about processing fleece into roving for spinning. Last year, my friend and I planned to tour a local fiber mill, and now there’s a real incentive to do it. In my excitement, I realized I have many questions about the next steps to get the best outcome from processing this precious fiber at my local mill. Here’s what I learned!
1) Skirting the fleece is an important step!
Skirt the fleece – What does skirting mean? It’s not about dressing your fleece with a tutu but removing the less desirable parts that come with raw fleece, such as vegetative matter (VM)/hay, tags (feces), and second cuts (shorter pieces of fleece from shearing an area twice). Skirting is a crucial step in preparing your fleece for the mill. Most mills charge based on the incoming fleece’s weight, so skirting removes unusable waste like dirt and debris, reducing the weight and cost. Skirting a fleece takes time and energy, and it’s best to avoid windy days to prevent your fleece from blowing away—ask me how I know! In the future, consider making a skirting table, a frame with a screen that lets dirt and debris fall through. There are several YouTube videos on how to make your own like this one by Shepherd Industries .
Valais black nose sheep
photo credit- monikas_wunderwelt
2) Make a list of questions to ask the mill prior to sending your fleeces for processing.
What is the minimal and maximal staple length their equipment can handle?
Staple length is the length of lock or fiber from butt to tip.
Is there a minimum amount of fiber that is required to get processed ?
My local mill is a small operation and will work with small batches even if you only have one fleece to process.
What breeds of sheep the mill tends to process?
This turned out to be a very important question for me because Valais blacknose sheep is not a common breed here in Canada and this breed tends to have a long staple length. One of my fleeces could not be processed because it had a staple length greater than 8 inches.
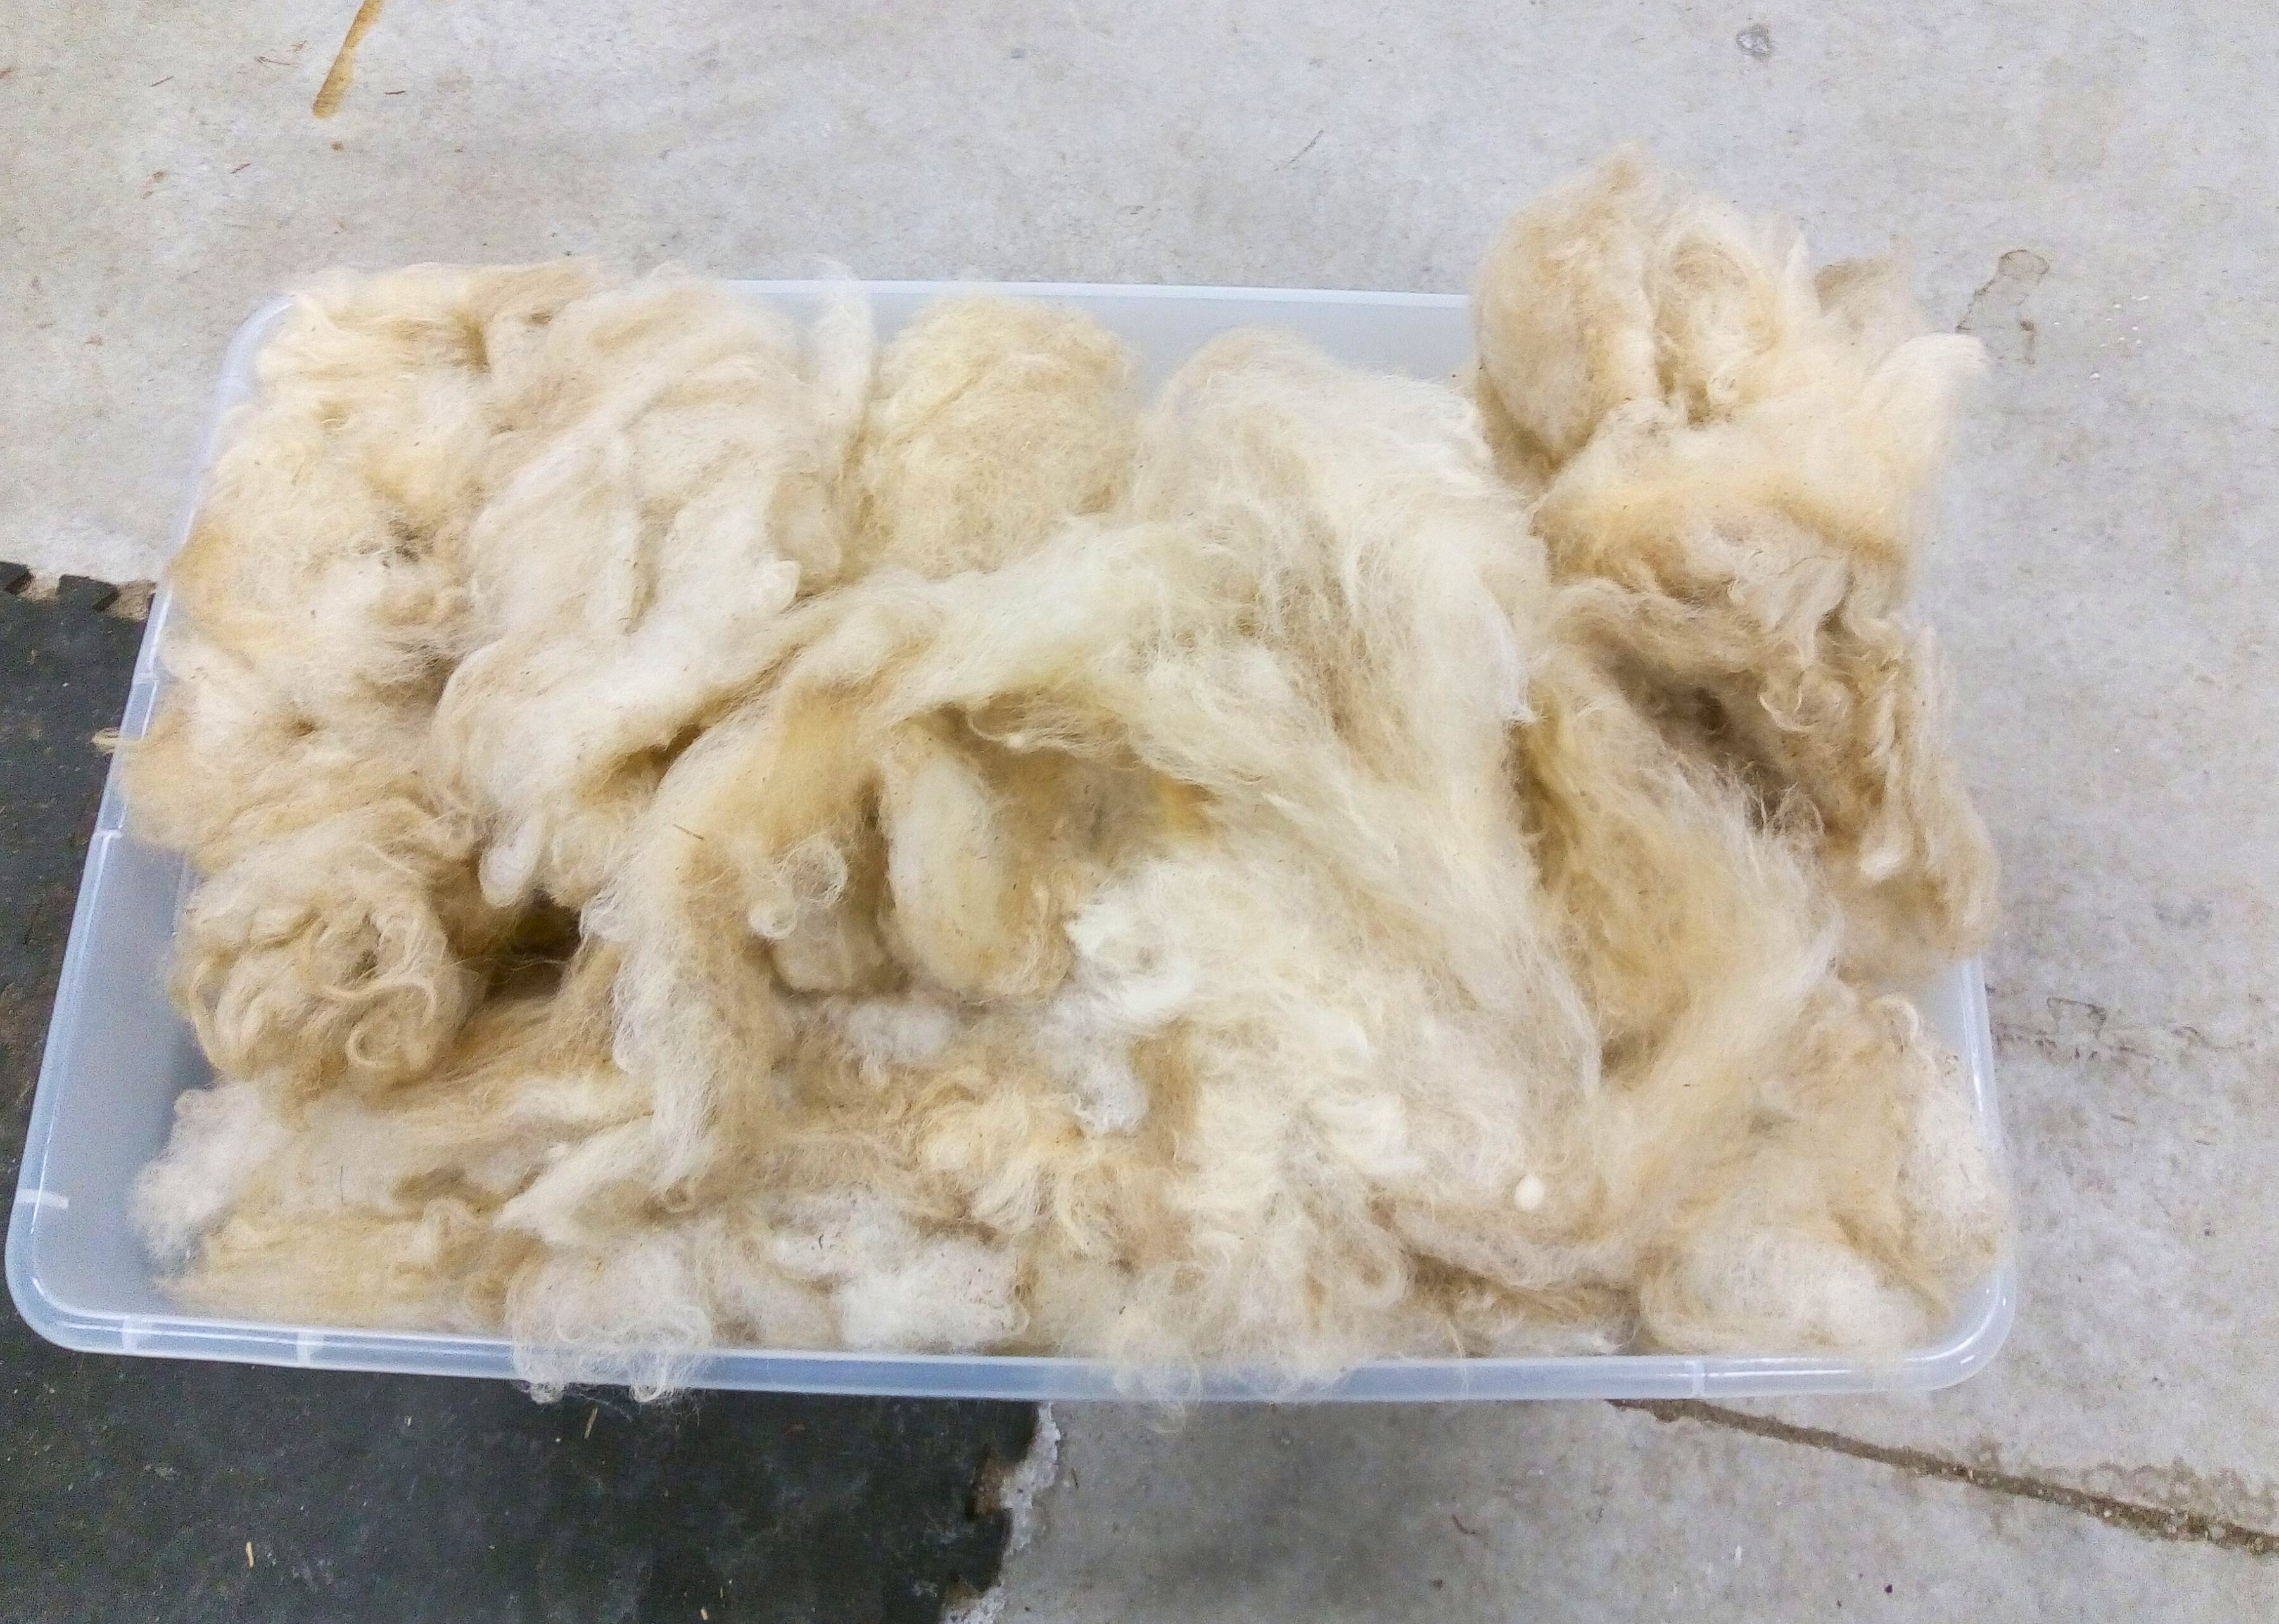
my skirted wool fleece
What is the turn around time for processing your fleece?
The estimated time in my case will be 3 to 4 months which is fine since I still have fiber I can spin and it gives me time to brainstorm ideas . It could be worse considering some mills have a year turnaround time.
What processing services do they provide?
My options were limited to making a roving or batt or felted into sheets. This mill had only a picker, carder and felting machine onsite. Yarn can be done but it is sent to another mill. Some mills have services include dyeing and blending with other fibers.
Another useful tip I found is to prewash your fleece to save on costs, as approximately 30% of the dry weight is due to lanolin. If your fleece is very dirty, mills may charge an additional fee to clean it.
Since this is my first time processing a fleece, I’m sure I’m only scratching the surface of the topic. What I’ve learned so far has made me respect the labor-intensive process of converting fleece into yarn even more. While I know how much time it takes to make yarn, I’ve discovered there are many additional steps required to transform raw fleece into a spin-ready preparation. I admire handspinners who process their own fleece and might try it myself in the future. For now, I appreciate the opportunity to support local mills. Have you ever bought fleece and processed it yourself, or have you sent it out to a mill? Feel free to comment below.
I came across an old weaving pattern from the January/February 1994 Handwoven Magazine called “Winter Lichen Towels” by Jean Scorge. It featured two main aspects I wanted for my new project: 1) the twill color weave technique, and 2) a geometric/block design. These were not my usual preferences, but I was eager for a challenge and something different. However, the most significant challenge I faced with this project was creating a fresh color scheme to give it a modern twist.
Understanding color theory wasn’t easy for me, despite being creative. Picking colors that worked well together to enhance my projects didn’t come naturally. I usually preferred darker shades like black, navy, and charcoal because they felt comfortable to me. Mixing colors with similar darkness seemed safe, but it often resulted in losing the design’s impact. Even though I knew about primary colors and how they combine to form complementary, secondary, and tertiary colors, I still lacked confidence in choosing colors wisely. However, watching Gail Defrusne’s video “The Value of Values” changed my perspective. Her approach of considering values, or the darkness or lightness of colors, helped me select colors and plan designs more efficiently and effectively.
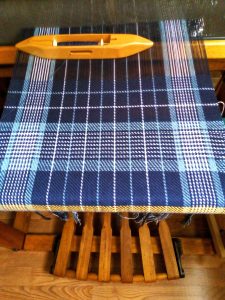
updated Winter Lichen handwoven towels
The original colors in the pattern were sage green, white, and charcoal. While I liked each color individually, the combination felt dated with this pattern. Instead of relying on the color wheel for inspiration, I chose to visualize the pattern in grayscale, akin to pencil shading. In the future, I plan to take a picture of the pattern and apply a black and white effect for a quicker reference. Then, I organized my stash of 8/2 cotton into dark, medium, and light tones. I opted for navy as the dark color, denim blue as the medium tone, and white as the light tone. The next step involved deciding where to place these colors within the geometric design to highlight the contrast between dark and light. In the border section of the pattern, I alternated colors every two rows (picks of weaving) to draw attention to this detail. Alternating navy and white, which offered the most contrast, seemed the logical choice. Seeing the prewashed finished towels, following the original weaving pattern, I’m thrilled with the result! It brings a refreshing update to the older pattern.
For the next two towels, I’m changing the weaving pattern to incorporate more color blocking. One towel will feature a solid block of navy, while the other will alternate navy and white every four rows (picks). I’m hoping that this weaving style will give the almost vintage pattern a modern twist. Check out this sneak peek video below to see how it’s coming along!
Exploring color more deeply, especially from a value perspective, has been really fulfilling. It’s pushed me out of my comfort zone of sticking to dark colors and choosing hues solely based on their position on the color wheel. I’m excited to apply this new approach to color planning and selection in all my future projects. How do you typically select colors for your projects? I’d love to hear your thoughts! Please comment below.
When I started spinning yarn, people often asked why I bothered when it’s so easy to buy. It’s a fair question, and I often wish I could explain in detail why. So, here’s a brief reminder for myself and an invitation for others to understand why I love spinning yarn. I hope fellow handspinners can relate, and those curious about spinning will dive into this rewarding craft and get hooked, just like I did.
1) One of a Kind!
Handspun yarn stands out distinctly, bearing the unmistakable mark of human craftsmanship that is difficult to replicate by machines. This human touch, with its imperfections, adds character to the yarn, making it special. Why does this matter? When you use handspun yarn in any fiber craft, it adds a unique quality to the pattern and, consequently, to the final design of your project. For instance, last fall, I worked on a French weaving project, which I detailed in my blog post “Harvesting Creativity.” While the weaving pattern itself was beautiful, using handspun yarn made the pattern more prominent, enhancing the overall design.
handspun yarn
From time to time, I enjoy going through my collection of handspun yarn to remind myself of what I have and to motivate myself to use it more in my fiber crafts instead of just keeping it stored away. It’s a way for me to get excited about upcoming projects and, despite my attempts to envision the finished item, I’m always pleasantly surprised by how it turns out. Because handspun yarn is so unique, it’s difficult to predict how it will behave or which aspects of a design it will highlight, and I believe that’s part of its charm. I’m looking forward to using it in projects I haven’t tried before, like rug hooking, and I’ll be sure to update you when I do.
2) Variability
I appreciate the versatility that handspun yarn offers, particularly in terms of its variability. One key aspect for me is the size or thickness of the yarn. While commercial yarn comes in different weights or sizes, I can still achieve variability even within these weight classes. For instance, my favorite yarn to use, fingering weight (also known as 4 ply yarn), allows me to create a thicker version that borders on sport weight yarn, or I can go the opposite way and produce almost lace weight without spinning too fine.
Another aspect I enjoy is the ability to control the number of plies to achieve the desired thickness and sturdiness of the yarn. For example, when knitting socks, a 3-ply yarn is generally preferred over a 2-ply yarn because the additional strand provides more resilience against friction when the socks are worn.
Most importantly, the variability of color arrangement is key. Fibers can be divided at color changes and spun separately, or divided into thin strips and spun randomly. This encourages more blending of colors, creating visual interest in the yarn strands and ultimately enhancing the final handmade project.
3) Enjoyment!
Expressing the joy of spinning requires acknowledging both its technical aspects and its inherent fulfillment. While learning the technicalities may seem daunting at first, once you find your rhythm, spinning becomes truly enjoyable. This enjoyment extends into other fiber crafts like knitting or weaving with handspun yarn. The unique texture and feel of handspun yarn, distinct from commercial yarns, add to the pleasure of working with it. Moreover, the knowledge that you’re creating from scratch adds depth to the slow making journey, fostering a greater appreciation for the final product and the creative process itself.
2 ply handspun yarn
If it wasn’t clear from my earlier words, I truly believe that spinning yarn is worth the investment. While it may indeed be more expensive and time-consuming compared to buying commercial yarn, the unique qualities, variability, and enjoyment factor it offers are unparalleled. The satisfaction derived from creating something entirely unique and the joy it brings to future projects outweigh the cost considerations for me. I’m eager to hear your thoughts on spinning or working with handspun yarn. Please feel free to share your comments below.
After the holidays, with a tight budget, I’m exploring creative ways to utilize the scraps of materials I’ve gathered over the years. Admittedly, I find it challenging to part with things, always believing I’ll find a future use for them. Whether that labels me a packrat or a hoarder, I’ll leave that question unanswered! This month, out of necessity, I’ve put my collection of wool strips, fabric scraps, yarn balls, and woven fabric pieces to good use, sparking fresh ideas for their creative application. This surge of inspiration has prompted me to share some current crafting projects and future plans with you.
1) Using leftover wool strips to hook a mug rug
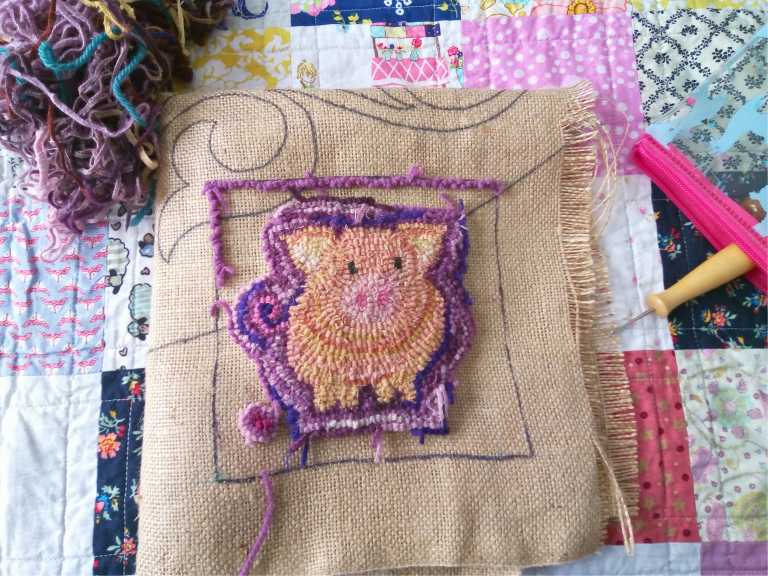
I must admit, I am addicted to rug hooking right now and I am eager to learn all there is to know about it. Fortunately, I know someone who has been hooking for years and graciously shared her knowledge and wool stash with me. Using a scrap bag of wool strips (often called “worms” in rug hooking), I designed a mini mug rug for a friend. Who knows, it may end up being used as a decorative feature in another crafting project! This experience taught me to experiment with new colors I don’t usually gravitate towards, work with smaller wool strips, and modify designs based on available materials.
hooked pig mug rug
2) Using fabric scraps to make a pincushion and mini quilt
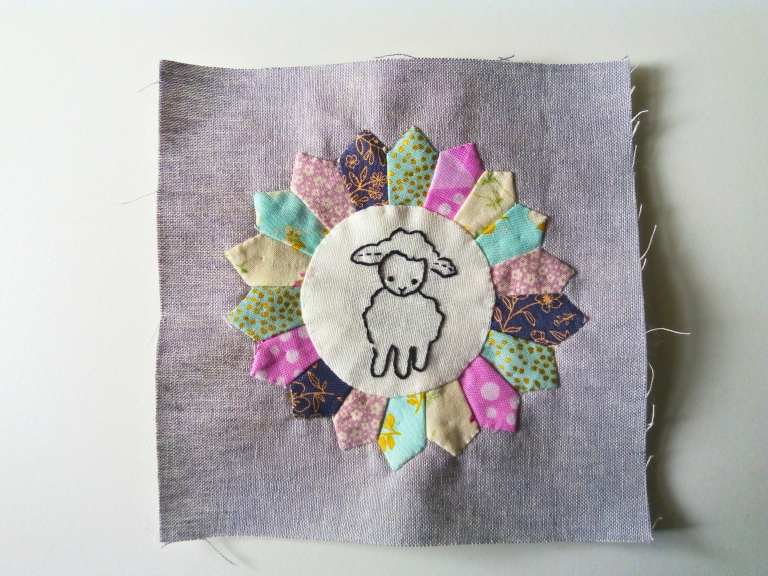
I have a 9×12 plastic bin where I keep all my fabric scraps from previous quilting projects. I limit it to that size to encourage myself to buy only the fabric I need for each project, but it’s still filled with tiny pieces of fabric that I didn’t know what to do with. Recently, I was inspired by a crafting YouTube channel called Crafty Cottage Stitches, which is hosting a #pinkeep social. The idea is to make different kinds of pin cushions using whatever materials you want. It was a light bulb moment for me! My bin of fiber scraps would be perfect for this project. Instead of just using random small pieces of fabric to make a multi-color rectangle and stuffing it with fiber fill, I remembered the Mini Dresden pin cushion pattern by Deidra McCollum from Quilty Obsession that I’ve had for more than 5 years. I was initially intimidated because I wasn’t familiar with hand applique and felt more comfortable sewing bigger pieces of fabric. However, I decided to give it a try. I used Amy Sinabaldi’s free embroidery pattern of a sheep to decorate the middle of the Dresden plate on the front panel of the boxed pin cushion. I can hardly wait to see the final product! Now that I’m looking at it, though, I don’t think I can even use it as a pin cushion—it’s too cute! 😊
mini pin cushion using fabric scraps
The pincushion wasn’t the only idea that came to mind when brainstorming what to do with my fabric scraps. A couple of months ago, I came across a workshop at one of my local quilt stores called kawandi quilting. After some research, I discovered that it involves hand-sewing pieces of fabric onto a larger piece to create a quilt. As you may know from my previous posts, I’m a big fan of hand embroidery. In fact, my first post was titled “The Great Quilting Showdown: Machine Quilting vs. Hand Quilting.” This is a project I plan to learn on my own, as there are several great YouTube tutorials available, like this one, How to Make a Kawandi Inspired Quilt, that shows you how to do it.
3) Using handwoven fabric samples to make ornaments
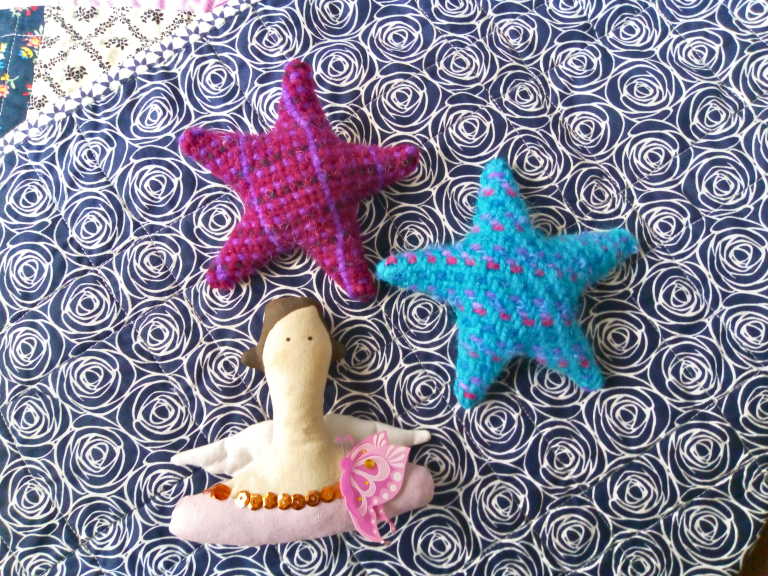
Initially, I was hesitant to admit that I might have a tendency to hoard crafting materials. You might think my collection of handwoven fabric pieces supports this idea. However, it sort of fell into my lap, so to speak. My weaving teacher was clearing out her cabinets of handwoven fabric samples and offered them to students like me. At the time, I didn’t know what to do with them, but they were free and beautiful, so I accepted them. Recently, I’ve been contemplating some personal designs that incorporate handwoven fabric. I’m not sure yet what these stuffed star ornaments will ultimately become—whether they’ll be part of a larger design (which I’m leaning towards) or a standalone project. Perhaps I’ll even fill them with lavender or other dried scented flowers. Regardless, I love how they turned out—soft and squishy.
sewn star ornament with hand woven fabric samples
This year, I’ve been focused on expanding my creativity by experimenting with materials in new ways and exploring different design approaches. Projects like the ones mentioned above have been particularly inspiring, and I’m eager to see how they develop in the coming weeks as I continue working on them. I’m committed to staying on this creative journey and discovering what other projects and designs emerge as I let go of the need to strictly follow patterns and instead embrace thinking outside the box. What about you? What projects are you currently working on that involve working with scraps? Feel free to share in the comments below!
Happy New Year, fellow makers! I hope you had a wonderful holiday season. Reflecting on 2023, I achieved many crafting goals, reconnecting with weaving and rug hooking. With the start of a new year, it’s time for fresh beginnings. I feel inspired to set new crafting goals and face new challenges in 2024. While I have exciting plans ahead, I also aim to complete lingering projects from previous years. As time passes, my project list has grown, and it’s time to make progress. Today, I want to share my crafting goals for 2024, hoping to stay focused and accomplish them!
1) Turning hand embroidered pieces into a complete finished object
I’ve been doing hand embroidery for a while now and I enjoy it immensely. It was my first venture into needlework and felt less daunting than cross-stitching. Taking an embroidery class on Craftsy for basic stitches helped too. I’d turn to this craft sporadically when I wanted something requiring less concentration but keeping my hands busy. Over the years, I’ve embroidered a small collection of 6-inch squares using designs from my favorite craft designers like Kathy Schmittz and Sarah Jane. Now, I’m pondering how to best arrange them into a project. I’ve checked the ‘Big Book of Hand Embroidery Projects’ for ideas, but I’m still uncertain about what to do next.
So what is holding me back from making a decision?
How to arrange them in a way to highlight each hand embroidered piece so they do not compete but still go well together.
Is it practical? Will I use it or store it away to collect dust.
I will have to design a layout especially if I plan to put into a wall hanging or mini quilt.
Decisions, decisions, decisions!!
6x6 inch embroidered pieces of linen
2) Practicing piecing and aiming for precision in quilting!
A few crafting friends and I decided to take on the Riley Blake Design Block Challenge this year, pushing me to explore more challenging aspects of quilting. I typically stick to standard piecing with straightforward stitching and minimal cutting. As I delve into the challenge, I’ve gone through my fabric stash, considering colors and deciding whether I need to add a couple more fabrics to achieve the desired finished quilt size of around 60 x 60 inches. I’ve successfully completed Block #1, Vintage Delight, piecing together various units to create an almost squared 10.5 x 10.5 block.
#RBDblockchallenge Vintage Delight quilting block
3) Weaving more with my handspun.
I’m expanding my weaving projects by using more of my handspun yarn to create fabric for future original designs, like small bags and household décor items. To accomplish this, I need to produce more handspun, but luckily, I have a good stash of fiber. Currently, I’m spinning some vibrant Corriedale fiber dyed by Funky Carolina, enjoying the colors as I spin. Additionally, I’ve acquired new fiber to spin. I’m considering spinning them as singles and then weaving them with another neutral-colored single-ply wool yarn, using a tight plain weave structure.
handspun yarn singles
4) Rug hooking an original design!
What is my original design involving? Of course, a sheep! Freestyling the drawing onto a piece of primitive linen foundation cloth using a sharpie, the design is approximately 6 x 6 inches and is intended to become a small wall hanging for my craft room. I plan to use leftover wool strips from a previous project, specifically hooking a sheep from the Buttermilk Basin pattern called Patriotic Sheep. Despite struggling to shift focus from this enjoyable project to complete others, it has inspired me to design more rug hooking patterns soon.
my rug hooking sheep design
These projects represent just a few on my to-do list for 2024, and I’m excited about completing them and sharing the finished pieces with you. Despite having a list, I’m leaving room for new inspiration and creativity to emerge. That’s the fun part of crafting – seeing where it takes you. Most of the time, it turns out better than you can ever imagine. What are your crafting goals for this new year? Please feel free to leave a comment below.
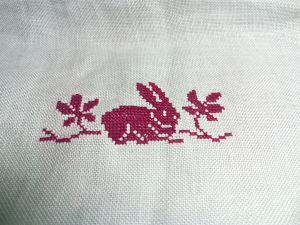
Hey there! I’m so excited to share my latest cross-stitching project with you! I absolutely adore cross-stitching, but I’ve always struggled with finding ways to display my finished pieces. Frames can be limiting, customizing them can be expensive, and finding enough wall space can be tough. But, one day I stumbled upon a wooden box while browsing at Michaels and I knew it was fate – it was the perfect way to showcase my latest project, a super cute cross-stitched rabbit! I thought it would be fun to share my experience with you and show you how I mounted my piece without ruining it. So, if you’re curious to see how I did it, keep reading!
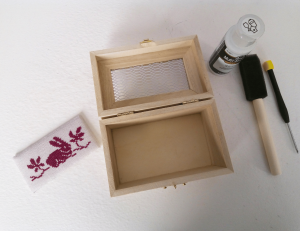
Acrylic paint (folkfirt multisurface sateen acrylic paint) colour: cottage white
Foam brushes
Painters tape
Cotton batting
Scissors
Miniature screwdriver
Steps taken to complete the project
Smoothed out the wrinkles on my cross-stitched piece using a hot iron on high heat and with steam. I don’t have to worry about the colors bleeding because DMC thread and linen were colorfast.
2. Measured the opening of the box and cut a mat piece and cotton batting to that size. Fasten the linen to the mat board with pins and thread using a tutorial by Nicola Parkman on YouTube, I found helpful. I’ve done this lots of times before and it looks great!
3. Glued the cross-stitched piece to the top of the wooden box with a hot glue gun after preparing the box. I took off the hardware, painted it with two coats of paint, and applied three coats of finishing wax using foam brushes.
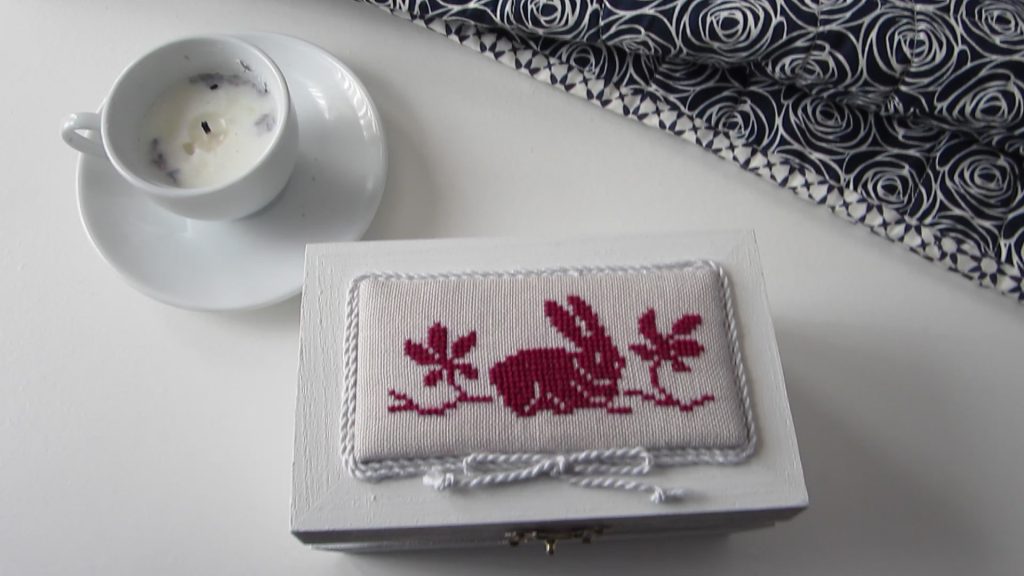
4. Created cording by using a cord maker to ply six layers of embroidery thread together. Attach the cording with hot glue around the edge of the cross-stitched piece. Now, it’s complete!
Overall, these are the steps I took to create a beautiful finished project.
Fully finished cross stitched project
I’m so happy with the way this turned out and I’d love to do it again for my other cross-stitched projects. I have a few more to finish. I’m also searching for other interesting items to display my cross-stitch on. For now, I’m going to use this piece to keep some extra materials like needles, ribbon, and buttons for future projects.
What is your favourite method to complete your cross-stitched piece, feel free to let me know in the comment section below.
Music: Passage by Jakob Ahlbom & Trust in You by AK Silla
Nature is my go-to source of inspiration, regardless of the season. However, I must admit that the changing colors of leaves, the bright autumn afternoon sun, and the pine needles covering the forest grounds rekindle my imagination. I have a strong desire to recreate the mood of comfort, stillness, and crispness that I experience during my woodland walks in the fall. What crafts am I gravitating towards this fall to reflect this change of pace?
Rug Hooking
My current rug hooking project is from an older Buttermilk Basin pattern called Patriotic Sheep. Using primitive cut wool strips (1/4 inch wide strips of wool) in rustic colours such as burgundy, mossy greens and burnt yellows. As you can see, I still have the main body to work on. I have a variety of creams and white wool fabric waiting to be felted and cut into strips. The final project will be a 3-dimensional sheep that will hopefully decorate my craft room.
rug hooking sheep
Weaving
Weaving with my multicolored handspun using a crackle weaving structure. The pattern is called the French pattern, and it is from Marguerite Porter Davidson’s book, A Handweaver’s Pattern Book. This book has a great compilation of older weaving patterns, but using this pattern along with my multicolored handspun is giving this old pattern new life while preserving the vintage feel and look. I will admit my initial choice of a gray color was more subdued, but I am glad I changed my mind. This fall season is bursting with color, and I wanted my current projects to reflect this.
using my handspun to weave the French Pattern
Knitting
Knitting socks during this time of year, I am obsessed with staying warm and what I can make that will keep me warm. Naturally, my feet are the first part of my body that get cold quickly, and it is not even below 0 degrees. I start rummaging through my yarn stash to find the perfect yarn that is sturdy and warm enough to start a new pair of socks. Then, I finish all the last year’s sock projects by closing the toes and weaving all the loose ends.
striped hand knitted knee high socks
Punch needle
It is not a craft that I often work on, but I do enjoy it immensely when I do. This pattern is a Michelle Palmer original punch needle design, and of course, I was drawn to it because of the cute sheep design. It was featured in a summer 2019 issue of the Punch Needle and Primitive Stitcher magazine, but I felt the color selections in this design reminded me more of fall leaves that decorate the forest floor instead of summer flowers in full bloom. I have the pattern stretched on some wooden bars for increased accessibility while I am cuddled under some blankets and sipping on a hot cup of tea.
punch needle sheep design by Michelle Palmer
Quilting
I find binding quilts takes a long time when I make blankets. But it feels good to be under the blanket while doing it. I usually bind quilts in the fall, after piecing them together during the summer when there’s more daylight. It gets too hot to manoeuvre the blanket while hand-sewing the edges. I feel good when I finish because I have a new blanket to keep me cozy during the winter while I work on other crafts.
What crafts are you drawn to when there is a change of season, especially when the weather gets cooler? Please feel free to comment below!
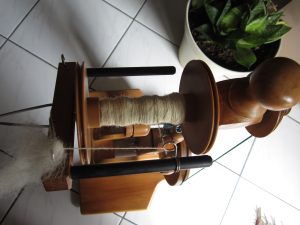
I have been spinning since 2011 and I would spin for hours daily.I was addicted and couldn’t fathom taking a break. Unbelievably, I went an entire year without spinning. This unexpected pause happened because the drive band on my spinning wheel broke, and I needed to replace it. I’d used the same band for over 8 years, so its breakage was inevitable. Nothing lasts forever! Long story short, it took a year to fix my Majacraft Little Gem II spinning wheel, and when I could finally spin again, I felt a mix of excitement and doubt. I questioned if I still knew how to do it. The good news is that this story has a happy ending. I got reacquainted with my spinning wheel by following these five steps:
1) Practice peddling first!
Yup just like how you learned to spin the first time I recommend just start peddling. Old age saying: Practice makes perfect is true! Patience is not my strongest virtue so you can imagine I wanted to skip this step all together and start making yarn. But just like how my spinning guru (Lori, from the Black Lamb) taught me in the beginning it is an essential step if you want to establish a rhythm while spinning. Yes, I had to get my groove back and guess what I still have rhythm. How long should you just practice peddling? There is no hard and fast rule! Keep peddling until you feel comfortable with your spinning wheel.
2) Pick a wool fiber that is easy to spin
One with a longer staple length and where all the fibers are aligned in the same direction. The more basic wool preparations (roving with no mixed blends of fiber types such as superwash merino cashmere blend) the better control you have while drafting because they are less slippery to work with. You can just focus on learning how to draft again in rhythm with the peddling of your wheel. Now I have every intention to return to my luxurious fiber blends because they are heavenly to spin with, even better to knit with and plus I still have a big fiber stash to get through.
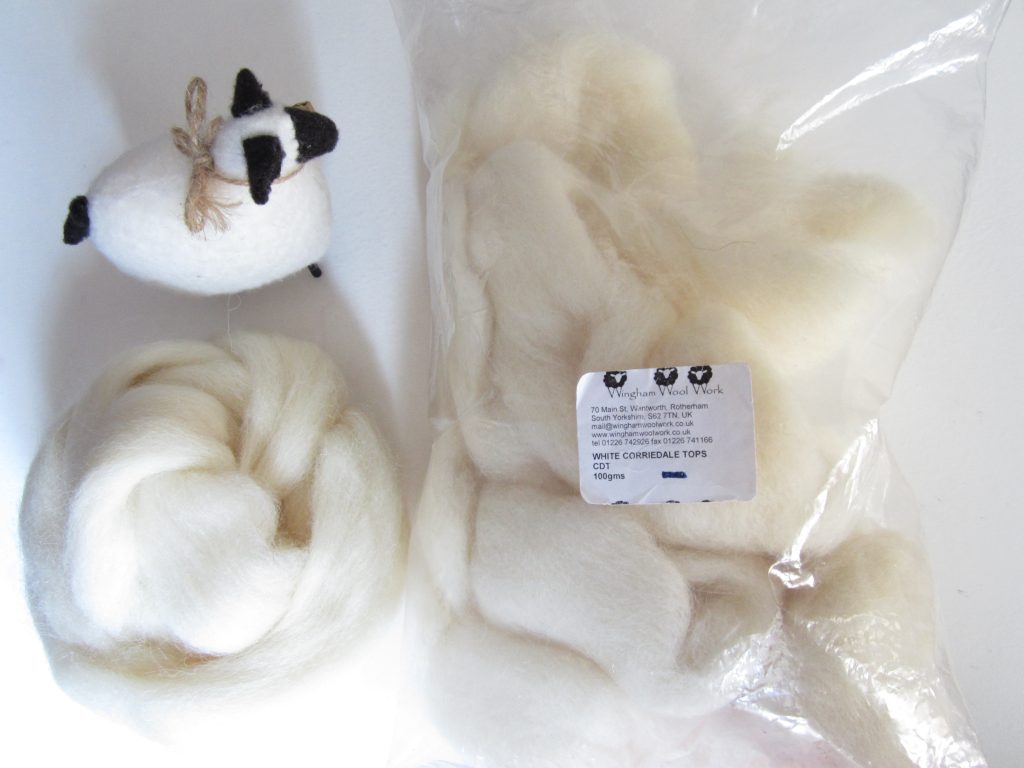
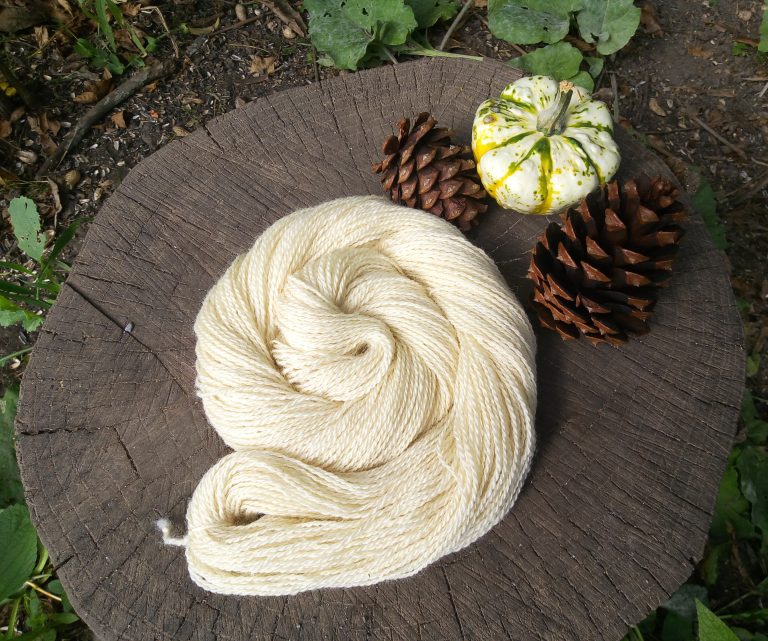
I received some awesome white wool from Wingham Wool Work through a fiber swap on Ravelry – such a thoughtful gift from my swap partner. I decided to work with the white wool to see how consistent I could make my spinning, which is important to me so that I can create even and consistent yarn. While I know using multicolored wool would have been more fun, I wouldn’t have been able to gauge the consistency of my yarn spinning. Plus, consistent spinning means that I can knit uniformed stitches, which is always a plus. Can’t wait to see what I’ll create with this yarn!
3) Reduce brake band tension
Readjust your brake band tension such that the wheel (specifically the flyer) does not fill the bobbin with the yarn as quickly and allow you enough time to draft properly. That way you are not fighting with the wheel. Keeping a consistent rhythm is challenging enough on your first go.
4) Create a relaxing environment
Can I be honest with you? I was nervous, which makes my muscles, especially my hands, tense up and grip my fiber supply tightly. This isn’t good for spinning because it leads to fiber entanglement and makes drafting difficult. Smooth drafting is crucial for creating consistent singles, which, in turn, helps produce beautiful 2 or 3 ply yarns. To ease my nerves, I set up a relaxing environment with a diffuser filled with calming essential oils and silence; no electronics, which I used to have when spinning.
5) Take breaks!
It is a good idea to step away from the wheel time to time. It allows you to re-evaluate what you have done. You might want to adjust how you are sitting or reposition the orientation of the orifice or even the tension on your wheel for the next spinning session.
The question, “Can I start spinning again?” can definitely be answered with a resounding “Yes.” All it required was establishing a rhythm, selecting the right fiber, adjusting tension, staying calm, and taking breaks. Handspinners often have various methods to reconnect with their spinning wheel, whether an old one or a new addition to their collection. My goal as a handspinner was rediscovering the joy of spinning, rather than delving into technical and analytical aspects. I find the most enjoyment in spinning when I’m fully present in each drafting moment. After spinning the singles, I consider how to ply them or sometimes let the singles sit while I work on another fiber. It’s a slow, satisfying journey, and I’m content as long as I’m in my spinning groove. If you’ve taken a break from spinning, please share your experiences and methods for getting back on track in the comments below!